• Skip to primary navigation
  • Skip to main content
  • Skip to primary sidebar
  • Skip to footer

iPhoneArena

APPLE IPHONE, MAC, WATCH AND IPAD

  • Home
  • iPhone
  • iPad
  • Mac
  • Apple Watch
  • Bug Fixes
  • How to
  • Tips and Tricks
  • Apps
You are here: Home / Archives for Troubleshooting

Troubleshooting

iPhone Flashlight Not Working? Here’s The Real Fix

By Kevin Shaw · March 27, 2026

Don’t fumble in the dark when your iPhone flashlight isn’t working. Follow these troubleshooting tips to fix it instead.

Many users have faced the frustrating issue of their iPhone flashlight not turning on. For example, you might have seen problems like your iPhone flashlight not working after an iOS update, the flashlight button grayed out, or your flashlight not turning on while the iPhone is overheated or locked.

So, how can you fix the flashlight and get it working again? Follow this troubleshooting guide to find out.

1. Charge Your iPhone

If your iPhone’s battery is almost empty, the flashlight may not work. So, the first thing you should do when your iPhone flashlight is not working is to charge your device.

Simply plug your iPhone into power. The flashlight feature should start working again once your iPhone has sufficient power.

2. Disable Low Power Mode

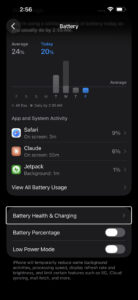
On an iPhone 15 or later, go to Settings > Battery > Power Mode and turn off Low Power Mode. On an iPhone 14 or earlier, go to Settings > Battery and turn off the Low Power Mode toggle. If you don’t see it in Settings, you can also check for the Low Power Mode tile in your Control Center and tap it to turn it off.

Screenshot showing Low Power Mode settings on iPhone

Low Power Mode kicks in automatically when your battery drops below 20%, and you can tell it’s on because the battery icon in the status bar turns yellow. While the flashlight is supposed to keep working in this mode, it doesn’t always cooperate — especially on older devices or after an iOS update that introduced a bug. Turning it off restores full power to all your iPhone’s features, flashlight included, and it only takes a couple of seconds to rule this out as the problem.

3. Check Your iPhone Isn’t Too Hot

When your iPhone gets too hot, the flashlight may stop working. It’s not advisable to continue using an overheating iPhone. If your device exceeds a particular temperature limit, it will eventually shut down until it cools off. You’ll also see a warning appear on your screen if the temperature gets too high.

To allow your device’s temperature to drop naturally, place your iPhone in a cool, dry place away from direct sunlight. Do not attempt to put your device into the fridge, though, as this will cause damage to it. Just find somewhere that’s naturally cool and shady. Once your device cools down, your iPhone flashlight should start working again.

Extreme cold can cause flashlight issues too. If your iPhone has been sitting in a freezing car or outside in winter temperatures, bring it indoors and let it warm up to room temperature before you try the flashlight again. Apple rates iPhone operating temperature between 32° and 95° F (0° and 35° C), and anything outside that range can temporarily disable features like the flash.

4. Close the Camera App

If your phone’s camera app is open, the flashlight won’t be able to take control of the LED.

Swipe up and hold on the center of the screen, then swipe up to close the Camera app.

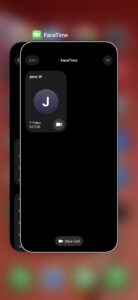
This also applies to any third-party app that uses your camera. Apps like Instagram, Snapchat, FaceTime, WhatsApp, and even QR code scanner apps all take control of the LED when they’re running, and sometimes they hang onto it even in the background. If your flashlight icon is grayed out and the Camera app isn’t open, swipe through your recent apps and close anything that might be using the camera — that’s almost always what’s going on when the button won’t respond.

iPhone App Switcher

5. Remove Your iPhone Case

Take off your iPhone case, any lens attachment, or camera film and try the flashlight again. Some cases (particularly thicker rugged ones or cases with sliding camera covers) can physically block the LED flash.

It sounds too obvious to be the fix, but it’s worth ruling out before you dig into software troubleshooting. If the flashlight works fine without the case and stops working when you put it back on, you’ve found your problem — and it’s a cheaper fix than a trip to the Apple Store.

6. Turn On Your Flashlight Using the Camera Flash

If you can’t turn on your iPhone flashlight from the Control Center, a workaround is to turn it on in the Camera app by activating the flash function. Here’s how:

In the Camera app, go to Video mode. Swipe up from the bottom menu (on the word, Video) to bring up more options. Tap the Flash icon. Select On.

7. Toggle the Flash in Your iPhone’s Camera App

To get rid of glitches that stop your iPhone flashlight from working, you can also try turning your camera flash on and off. The steps are the same as the workaround to turn on your iPhone’s camera flash, as discussed in the previous solution. But instead of leaving the Flash set to On, toggle between On and Off a few times.

8. Ask Siri to Turn On Your iPhone’s Flashlight

If your camera flash doesn’t seem to be working either, there’s another way to enable your iPhone flashlight: Siri. Siri can help you turn on your iPhone flashlight even if the icon is grayed out.

Activate Siri by long-pressing the Side button on your iPhone or saying, “Siri” or “Hey Siri.” When Siri starts listening, say, “Turn on the flashlight.” Your flashlight should turn on instantly, and Siri will also say that it’s on now.

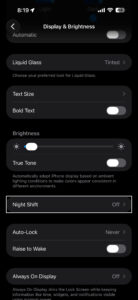
9. Adjust the Flashlight Brightness

Long-press the Flashlight icon on your Lock Screen or in the Control Center to bring up the brightness slider, then drag your finger from the bottom of the slider all the way to the top.

Your iPhone remembers the last brightness level you set for the flashlight, and if you accidentally dragged it all the way down to zero at some point, the flashlight will look completely dead the next time you tap it — the icon lights up like it’s on, but no actual light comes out. This trips up a lot of people (and honestly, it’s easy to do by accident when you’re adjusting the slider in a hurry). Pulling the brightness back up to maximum should fix it right away.

10. Update Your iPhone’s iOS

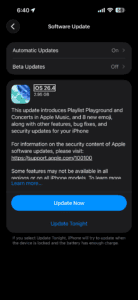
iOS updates usually come with fixes for performance bugs and various glitches. So, perhaps all you need to do to fix your iPhone flashlight is to update your iPhone to the latest version of iOS.

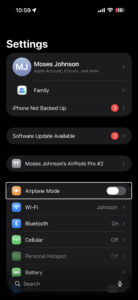
Go to Settings > General > Software Update to see if an update is available for your iPhone. Make sure your iPhone is charging or has more than 50% battery before you proceed with the update process.

On the other side of this, an iOS update can sometimes be what caused the flashlight to stop working in the first place. Apple Community threads are full of reports from users whose flashlight broke right after updating to iOS 16, iOS 17, or iOS 18. If your flashlight was fine before the update, and none of the fixes above have helped, you may be dealing with a software bug that Apple hasn’t patched yet — in which case a follow-up update is usually the only real fix, and you’ll want to keep checking Settings > General > Software Update every few days until one arrives.

11. Restart Your iPhone

If the above methods don’t solve the problem and your iPhone flashlight still isn’t working, the next step you should try is restarting your iPhone.

You can restart your iPhone by going to Settings > General > Shut Down > Slide to power off. Then, hold the Side button to restart your iPhone once it powers off.

12. Force Restart Your iPhone

If a regular restart didn’t help — or if your iPhone is frozen and you can’t get to Settings at all — try a force restart instead. On an iPhone 8 or later, quickly press and release the Volume Up button, quickly press and release the Volume Down button, then press and hold the Side button until the Apple logo appears.

A force restart is different from a normal restart because it clears out temporary memory and forces every background process to shut down completely, which can break a stuck app or service out of whatever loop it’s caught in. It won’t delete any of your data or settings. If a regular restart feels like closing and reopening an app, a force restart is more like pulling the plug and starting fresh — and for stubborn flashlight glitches that survive a normal reboot, it’s often the thing that finally works.

13. Restore Your iPhone to a Previous Backup

Besides updating and restarting your iPhone, you can also try restoring your iPhone to a previous backup from when the flashlight was still working as usual. However, when you use this method, keep in mind that you will also lose any new data that was added to your device since you made that backup.

14. Reset All Settings on Your iPhone

If your iPhone torch still isn’t working, the last solution you can attempt is to reset your phone’s settings by going to Settings > General > Transfer or Reset iPhone. Tap Reset and choose Reset All Settings from the pop-up menu. You won’t lose any data from your iPhone; all this does is revert your iPhone’s settings to factory default values.

Take note that the reset process can take a long time, especially if you have a lot of data on your iPhone. So, if you’re stuck in the dark and urgently need a flashlight, don’t rely on resetting your iPhone right there and then!

Make sure you don’t accidentally choose Erase All Content and Settings from the Reset menu. Doing that would delete all the data on your device.

Effective Solutions When Your iPhone Flashlight Is Not Working

If you’ve been stuck wondering why the flashlight won’t work on your iPhone, we hope this list of fixes has helped you resolve the problem effectively.

If you’ve tried every fix on this list and the flashlight still won’t turn on, there’s one more thing worth checking before you contact anyone. Open the Camera app, switch to Photo mode, turn the Flash to On, and take a picture in a dim room. If the LED doesn’t fire at all — no flash, not even a flicker — that points to a hardware problem with the LED module itself rather than a software glitch, and no amount of restarting or resetting will fix it.

However, if the issue persists, it’s best for you to contact an Apple Authorized Service Provider. You can also visit your nearest Apple Store. Just make sure to book a genius bar appointment first. A technician will then examine your device and determine the potential hardware repairs that are needed.

iPhone Black Screen? Here’s The Real Fix!

By Stacey Butler · March 27, 2026

Learn what to do if your iPhone has the black screen of death.

Black screens might appear if your iPhone overheats, encounters a major error, or the screen itself breaks.

To fix iPhone black screen, you should first plug your phone into a charger to make sure that it isn’t simply out of battery.

If you’re lucky, a force restart may be all you need to fix your iPhone black screen issue. Otherwise, you’ll need a computer.

If Find My is enabled, or you’re connecting your iPhone to a computer for the first time, you cannot restore it using Finder or the Apple Devices app.

If a force restart and standard restore don’t work, try DFU mode — it reinstalls iOS at the deepest level and can fix problems that recovery mode can’t.

If software fixes fail, physical damage might be the culprit. Take your iPhone to Apple or an authorized service provider to diagnose and resolve hardware issues.

The black screen of death occurs when an iPhone is completely unresponsive. Sometimes, you’ll hear alerts and feel vibrations, but you won’t be able to interact with your phone. Although physical damage is often the culprit, you shouldn’t rule out system glitches.

Luckily, there are ways to fix nearly every “Black Screen of Death” glitch on your iPhone. Depending on the problem, you might just need to leave the iPhone alone for a while, or plug it into your computer.

Here’s what to do if your iPhone has the black screen of death, and some tips for preventing black screens in the future.

How to fix a black screen on your iPhone

1. Charge your iPhone

The first thing you should do if your iPhone has the black screen of death is to check that your phone’s battery isn’t dead. When you try to interact with an uncharged iPhone, it’ll usually flash an empty battery icon. But if the battery’s been totally drained, the screen might go completely blank.

Plug your iPhone into a working charger and leave it for at least an hour. If you come back and it’s still showing a black screen, then you can move onto the next steps.

If your iPhone is a couple of years old, it’s worth checking your battery health once the screen comes back on. On iPhone 15 and later, go to Settings > Battery > Battery Health and look at the Maximum Capacity percentage. (On iPhone 14 and earlier, this is under Settings > Battery > Battery Health & Charging instead.) iPhones with a battery below 80% are more likely to experience unexpected shutdowns and black screens, especially during or right after an iOS update — that long update process can push a weak battery past its limit. Apple recommends replacing the battery once it drops to around 80%.

Battery settings on iPhone

Quick tip: You should also feel the back of your iPhone, without its case. If it’s incredibly hot, your iPhone might be overheating and will need to cool down before you can use it again. Leave it in a cool area for a while.

2. Force Restart Your iPhone

The next thing you should do when encountering the black screen of death issue is force restarting your iPhone. This is different from a regular reboot, and it’s useful when you can’t shut your iPhone down normally.

Force restarting requires a combination of button presses and can take a few tries since you’ll need to press each button quickly. Quickly press the Volume Up button, then the Volume Down button, and then press and hold the Side button until you see the Apple logo appear.

If your iPhone went black during or right after an iOS update, a force restart is still the first thing to try. Sometimes the update process stalls and leaves the screen dark even though the phone is technically still on (and you might still feel it vibrate or hear notification sounds). The force restart can take up to 20 seconds of holding the Side button before anything happens, so don’t give up too quickly — count it out.

3. Restore Your iPhone With Apple Devices or Finder

If your iPhone screen is still black even after you’ve tried force restarting it, you’ll need to factory reset it. You can do this using the Apple Devices app for Windows or Finder on macOS.

Restoring your iPhone with the Apple Devices app or Finder will erase all its data and bring it to factory settings. So, only try this if you have a recent backup so that you don’t lose all your data.

Note that this method will only work if you’ve connected your iPhone to Apple Devices or Finder before. That’s because when you connect your iPhone to a computer for the first time, you’ll get an alert on your iPhone (and your computer), prompting you to trust the device.

You can’t tap Trust on an iPhone showing a black screen, so you’ll have to hard reset your iPhone using the recovery or DFU mode, which we’ll discuss later.

Additionally, you can only proceed with these steps if you have Find My disabled on your iPhone. Otherwise, you’ll get an alert message prompting you to turn off Find My during the process. In this case, you’ll need to disable the Find My feature from iCloud and erase your iPhone remotely.

To do that, go to iCloud.com/find on any browser, sign in with your Apple Account, select your iPhone from the list, and tap Erase iPhone. This wipes the device remotely, which also removes the Find My lock so you can set it up fresh from a backup afterward. You’ll need to remember your Apple Account password to get through this, so make sure you have that handy before you start.

As long as you meet the above requirements, you’re all set. Simply connect your iPhone to your PC or Mac using a USB cable. Launch the Apple Devices app or Finder, and follow the steps mentioned below:

Click [Your Name]’s iPhone under the Locations header on the sidebar. You can skip this step if you’re using Apple Devices.

Head to the General tab and click Restore iPhone on the right.

When prompted to back up your settings before restoring your iPhone, click Back Up.

Next, click Restore when you get a confirmation pop-up.

The process may take several minutes to complete. So, be patient. Once it’s done, you can restore your iPhone from a backup.

4. Use Recovery Mode to Factory Reset Your iPhone

Recovery mode is a feature that lets you connect your iPhone to a computer so the computer can repair it. It usually does this by installing a fresh version of iOS, the software that your phone runs on.

Entering recovery mode on your iPhone requires you to force restart your device once you connect it to your computer and launch Apple Devices or Finder.

Quickly press and release the Volume Up button. Then, repeat the same with the Volume Down button. Finally, press and hold the Side button until you see the Recovery Mode screen.

The Apple Devices app or Finder will now show a pop-up message indicating that it has detected an iPhone in recovery mode, after which you can choose to Update or Restore your device.

Try Update first. Updating reinstalls iOS without erasing your data, which means you won’t lose your photos, messages, or apps. If the black screen was caused by a corrupted or failed iOS update, this alone can fix it — and you keep everything. Only choose Restore if the update doesn’t work or fails partway through, because restoring wipes the iPhone completely and brings it back to factory settings.

5. Put Your iPhone in DFU Mode

If recovery mode didn’t fix the black screen, DFU mode goes a step deeper. Connect your iPhone to your computer with a USB cable, open the Apple Devices app or Finder, then follow this button sequence: quickly press and release the Volume Up button, quickly press and release the Volume Down button, then press and hold the Side button until the screen goes black. Once the screen is black, keep holding the Side button and also press and hold the Volume Down button together for about 5 seconds. After 5 seconds, release the Side button but keep holding the Volume Down button for another 10 seconds.

If you did it right, your iPhone’s screen stays completely black — no Apple logo, nothing — and your computer will say it detected a device in recovery mode. That’s DFU mode. The timing on those button presses is finicky (and honestly a little annoying), so you might need two or three attempts before you get it. If the Apple logo shows up at any point, that means you held the Side button too long, and you’ll need to start over.

DFU stands for Device Firmware Update, and it lets your computer reinstall both the firmware and iOS from scratch. Recovery mode only reinstalls the operating system, but DFU mode goes underneath that to the firmware layer, which is why it can fix problems that recovery mode can’t — things like boot loops or corrupted system files that keep the iPhone stuck on a black screen no matter what else you try. Save this step for after recovery mode fails, because a DFU restore erases everything on the iPhone and there’s no way around that.

One thing to watch out for: if you’re using a USB-C to USB-C cable and DFU mode won’t trigger, try switching to a USB-A to Lightning or USB-A to USB-C cable with an adapter. Some users have reported that certain USB-C cables don’t work reliably for DFU mode.

6. Take Your iPhone to Apple

If none of these solutions work, the black screen of death is likely due to physical damage or other hardware issues. In that case, you must contact Apple Support or take your iPhone to a nearby Apple Store or an Apple Authorized Service Provider. It’s easy to make an Apple Store appointment at a Genius Bar.

If your iPhone was recently exposed to water or any other liquid — even a brief splash — that could be causing the black screen. On iPhone 13 and earlier (or models sold outside the US that still have a SIM tray), you can check for liquid damage by popping out the SIM tray and shining a light inside — there’s a small Liquid Contact Indicator (LCI) in there that turns red when it’s been in contact with water. On US models of iPhone 14 and later, there’s no SIM tray and no externally visible LCI, so you won’t be able to check this yourself — bring it to Apple or an Apple Authorized Service Provider and they can inspect it internally. If it’s red, liquid damage is the most likely cause, and no amount of force restarting or restoring will fix a hardware-level short circuit.

If you recently had your iPhone screen replaced by a third-party repair shop (not Apple or an Apple Authorized Service Provider), that’s another thing to mention when you bring it in. Third-party screens can sometimes lose connection with the display after an iOS update, leaving you with a phone that works in the background but shows nothing on screen. The fix in that case is usually having the repair shop reseat or reconnect the display cable.

Remember that Apple’s standard one-year warranty doesn’t cover replacements or repairs for damaged screens. So, unless you’ve spent money on an AppleCare+ extended warranty plan, you’ll have to pay a fee to get your iPhone serviced.

How to prevent black screens on your iPhone in the future

Hitting an unresponsive black screen can be scary, especially if your iPhone plays a critical role in your job or social life. So once you’ve fixed the black screen on your iPhone, take steps to make sure that it doesn’t come back.

Uninstall glitchy apps

If the black screens started appearing on your iPhone after you installed a certain app, the two might be connected.

Uninstall any apps you’ve downloaded recently and continue using your phone. If the black screens stop happening, you know what caused it.

Keep your iPhone at a normal temperature

Despite its price, the iPhone is a delicate device that needs to be handled carefully. Obviously, this means that you shouldn’t drop it or smother it in honey. But it also means that you need to keep track of its temperature.

An iPhone that gets too hot or too cold will shut down and give you a black screen — worst case scenario, your battery might short out permanently. This can be a big problem if you’re trying to run multiple high-performance apps at once, or have your iPhone in a thick case that traps heat.

Apple recommends storing your iPhone in areas where the temperature ranges from -4º to 113º F (or -20º and 45º C).

In some cases, your iPhone might freeze and show a warning message telling you to let it cool down. If you see this, move to a cooler area and leave your iPhone alone for a while.

Use Certified Charging Accessories

Stick to Apple-certified (MFi) cables and chargers whenever possible. Cheap or counterfeit charging accessories can deliver inconsistent power to your iPhone, and over time that can cause battery issues, unexpected shutdowns, or — in worst-case scenarios — damage to the charging circuit on the logic board. If you’ve been using a no-name cable from a gas station and your iPhone starts acting up, try swapping it out for a certified one before you assume something bigger is wrong.

Keep an Eye on Battery Health

On iPhone 15 and later, go to Settings > Battery > Battery Health every few months and check your Maximum Capacity. (On iPhone 14 and earlier, look under Settings > Battery > Battery Health & Charging.) Once that number drops below 80%, your iPhone’s battery is considered degraded and you’re more likely to run into random shutdowns, black screens during updates, and general instability. Apple will replace the battery at an Apple Store or authorized service provider — it’s a lot cheaper than replacing the whole phone, and it can make an older iPhone feel new again.

Factory reset your iPhone

If you keep hitting black screens despite uninstalling recent apps, there might be an issue with your version of iOS. You can put the iPhone into recovery mode, like we described earlier, or you can factory reset it.

Factory resetting an iPhone will erase all of its data, and return the phone to the state it was in when you bought it. It’s an extreme but incredibly useful way to fix major glitches.

Important: Be sure to back up your personal data before performing a factory reset.

To factory reset your iPhone, open the Settings app and tap General, then Transfer or Reset iPhone. On the screen that appears, select Erase All Content and Settings.

Although the black screen of death on an iPhone can be an immediate cause for concern, it’s worth trying a few software fixes before seeking professional help, especially if you haven’t physically damaged your iPhone. Start with charging and a force restart, move to recovery mode if those don’t work, and try DFU mode as a last software-level resort. If nothing brings the screen back, the problem is almost certainly hardware — a damaged display, a failing battery, or a loose internal connector — and you’ll want to get it looked at by Apple or an authorized service provider rather than trying to fix it yourself.

iPhone Photos Not Syncing to iCloud? Here’s The Fix

By Stacey Butler · March 27, 2026

Find out what you can do if your iPhone photos aren’t syncing to iCloud.

iCloud Photos is a nifty iPhone feature that saves every photo and video you take to the cloud, allowing you to access your library from any device at any time. Any changes you make to your collection on one device are replicated across all of your other devices.

But, sometimes, things go wrong in the pipeline, and your Apple devices stop syncing your photos. If for some reason, your iCloud Photos aren’t syncing properly, you could lose some precious photos and fond memories. So, to avoid that pain, let’s look at a few steps to take if your photos aren’t syncing to iCloud.

1. Check Your Settings

If your photos aren’t syncing to iCloud on your iPhone, you should first check if you have the correct iCloud Photos configuration. First, open the Settings app and tap on your name at the top of the screen. Check that you’re signed in to the same Apple Account you used to set up iCloud Photos.

If you’re already signed in to the correct Apple Account, the second step is to ensure that iCloud Photos is enabled on your device. Tap on iCloud, select Photos, and check that Sync this iPhone is toggled on.

Turn on Photos in iCloud Settings

If Sync this iPhone is already on but your photos still aren’t uploading, try toggling it off and then back on again. Wait about 30 seconds before you flip it back on — this forces your iPhone to re-establish its connection with Apple’s iCloud servers and can kick a stuck sync back into gear.

If you set up an iCloud Shared Photo Library, there’s one more thing to check. When you move photos to your Shared Library, they disappear from your Personal Library, and that can look a whole lot like a sync failure when it’s actually working as intended. Open the Photos app, tap Library, then tap the Sort and Filter button — or tap Collections, then tap the More button — and look at your Library View Options to confirm you’re viewing Both Libraries rather than just your Personal Library. (On iOS 18, tap the profile button in the upper corner instead and scroll down to Library View Options.)

2. Check Your Internet Connection

Because iCloud is a web-based service, iCloud Photos may not sync on your iPhone when your internet connection is not working. To ensure your connection is good, check to see if other apps can connect to the internet or try to launch a new web address in your browser.

If the problem is your internet connection, try resetting your router or troubleshooting your cellular data to see if that solves the problem. You can also try resetting your iPhone network settings.

To reset your network settings, go to Settings > General > Transfer or Reset iPhone > Reset > Reset Network Settings. Your iPhone will restart, and when it comes back up you’ll need to re-enter your Wi-Fi passwords — all of them get wiped along with any saved VPN configurations and Bluetooth pairings. It’s a bit of a hassle, but it clears out corrupted network data that can quietly prevent iCloud from connecting.

If your connection is fine but you’re attempting to use cellular data for iCloud Photos, you need to enable this function first. Otherwise, your iCloud photo library will not show up on your iPhone.

To do so, turn on your iPhone’s cellular data first. Then, go to Settings > Apps > Photos > Cellular Data. Toggle on Cellular Data, and if your data plan allows, you can also opt to toggle on Unlimited Updates.

3. Turn Off Low Power Mode

Go to Settings > Battery > Power Mode and make sure Low Power Mode is turned off. If your iPhone battery is below 20%, iCloud Photos will pause syncing on its own even without Low Power Mode enabled, so plug in before you troubleshoot further.

Screenshot showing Low Power Mode settings on iPhone

Low Power Mode cuts back on background activity to stretch your battery life, and iCloud Photos syncing is one of the first things it shuts down. It’s easy to overlook. After all, a lot of people turn it on during a busy day and forget about it, then spend an hour wondering why their photos aren’t uploading to iCloud. While you’re at it, check for Low Data Mode too — go to Settings > Wi-Fi, tap the info button (the little ⓘ) next to your connected network, and make sure Low Data Mode is off. That setting throttles background data usage (which includes photo uploads) and can quietly block your iCloud Photos sync without any visible warning.

4. Check Apple’s System Status

Open Safari and go to apple.com/support/systemstatus to check whether iCloud services are experiencing an outage. Look for Photos, iCloud Account & Sign In, and Apple ID specifically — if any of those show a yellow or red indicator, the problem is on Apple’s end and no amount of troubleshooting on your iPhone will fix it.

Apple’s servers don’t go down often, but when they do, it affects millions of devices at once. There was a widespread iCloud outage in February 2026 that knocked out Photos, Find My, and several other services for hours. If you see a problem on the status page, the only thing to do is wait for Apple to resolve it — usually a few hours at most. Bookmark the page so you can check it fast next time something feels off.

5. Check Your iCloud Storage

Another common culprit for photos not uploading to iCloud on your iPhone is a lack of storage. Every Apple user gets 5GB of free iCloud storage, but that’s hardly enough—especially if you take many photos regularly.

To be sure you haven’t run out of storage, you’ll have to check your current usage.

  1. Go to Settings.
  2. Tap your name.
  3. Tap iCloud.

You see how much space you have left in iCloud and if you need to upgrade your storage plan. If you have maxed out your free iCloud storage, you need to either upgrade your storage plan or reduce the amount of storage that you’re using. Tap Manage Account Storage to see how apps are using your storage.

6. Optimize Your iPhone Storage

Depending on the quality of photos you’ve chosen to upload to iCloud, you could max out your iPhone storage quickly, which will also cause iCloud Photos to not update correctly.

By default, all your photos and videos are saved in their original, high-resolution format on your device and in iCloud Photos. But you can use the Optimize Storage feature to save storage space on your iPhone.

Optimize Storage allows iCloud Photos to manage the size of the library on your iPhone. When this option is turned on, your original, high-quality photos and videos are stored in iCloud, while compressed versions remain on your device. You can download the full-resolution versions from iCloud via Wi-Fi or cellular at any time.

To enable this option, follow these steps:

  1. Tap Settings > [your name] > iCloud > Photos.
  2. Select Optimize iPhone Storage to save space on your device.

7. Check Your Photo Library Status

Open the Photos app and tap the profile button in the upper corner of the screen — on iOS 26 or later, tap Collections first, then tap the profile button. Your library status appears right below your name and photo count, and it will tell you exactly what’s going on with your sync: whether it’s paused, actively uploading, or stuck on a specific number of items.

This is the single most useful diagnostic step that most people skip. Your iPhone is actually pretty good about telling you why syncing stopped — the problem is that the status message is buried in a spot nobody thinks to look. You might see messages like “Optimizing System Performance” or “Poor Network Connection” or even “[Device] Needs to Cool Down,” and each one means something different. If you see a Sync Now button, tap it to force an immediate upload. If the status says your library is up to date but you’re still missing photos on another device, the issue might be on the receiving end rather than the uploading end.

8. Restart Your iPhone

If your iCloud Photos are still not syncing, try rebooting your iPhone. This will fix any software glitches that could be hindering your photos from syncing to iCloud. Simply turn your iPhone off and back on, then check if your problem is fixed.

9. Update Your iPhone

An outdated version of iOS could be the reason for many performance issues, including the problem where iCloud Photos is not syncing on your iPhone. Check your phone for software updates and install them to fix any bugs that might be the culprit of the issue.

  1. Go to Settings > General > Software Update.
  2. If an update is available, tap Update Now then follow the onscreen instructions.

10. Plug In Your iPhone to Charge

iCloud syncs photos when the device is plugged in and connected to Wi-Fi. So, if iCloud Photos isn’t syncing, find the nearest power outlet and plug your phone in. Then, make sure your iPhone can connect to Wi-Fi while you leave it alone to charge and sync.

If you have a large photo library — we’re talking thousands of photos and videos — the initial sync can take a long, long time. Apple recommends leaving your iPhone plugged in and connected to Wi-Fi overnight to let the upload finish without interruption. Don’t keep checking the Photos app every five minutes either, because opening and using the phone can slow down background syncing. Lock the screen, walk away, and let it work.

11. Sign Out and Back Into Your Apple Account

Go to Settings, tap your name at the top, scroll all the way down, and tap Sign Out. Your iPhone will ask whether you want to keep a copy of certain data on the device — choose to keep it so nothing gets removed. Once you’re signed out, wait a minute, then sign back in with the same Apple Account.

This is a heavier fix and you shouldn’t need it in most cases, but signing out and back in forces your iPhone to rebuild its connection to iCloud from scratch. It clears out authentication tokens and any corrupted sync state that a normal restart wouldn’t touch. The downside is that it takes a while for everything to re-sync afterward (not just photos — your contacts, calendars, notes, and other iCloud data will all need to re-download too), so don’t do this one right before you need to be somewhere.

Keep Your iCloud Photos Synced and Up to Date

iCloud Photos is an excellent feature for syncing media across your Apple devices. If you take advantage of it, make sure you have everything set up and running smoothly so that it serves its purpose.

We hope that the above fixes have resolved any hitches you ran into. However, if you still encounter issues where your iCloud Photos aren’t syncing, you may want to take your iPhone to a Genius Bar for more help.

Before you make a Genius bar appointment, try reaching out to Apple Support through the Support app or at support.apple.com — they can run remote diagnostics on your iCloud account that you can’t do yourself, and sometimes the issue is a server-side flag on your account rather than anything on your device. If your photos have been stuck for days and you’ve gone through every step here, that’s a strong sign the problem goes deeper than settings.

No Internet connection on your iPhone? Here’s The Fix

By Moses Johnson · March 27, 2026

Seeing the dreaded No Internet connection on your iPhone? We’ll show you the steps to follow when you have no internet access but are still connected to Wi-Fi on iPhone.

  • Check if the problem affects all your devices or just your iPhone
  • Restart your iPhone, then restart your router and modem
  • Toggle Airplane Mode on and off to refresh your wireless connections
  • Update your iPhone to the latest version of iOS
  • Disable any active VPN connections
  • Forget the Wi-Fi network and reconnect with your password
  • Turn off Wi-Fi Assist in your Cellular settings
  • Switch your DNS settings to Google or Cloudflare
  • Reset your network settings as a last resort

Sometimes your iPhone will say it’s connected to Wi-Fi, but a “No Internet Connection” message appears below the name of your network. If your iPhone is experiencing this problem, this article explains the steps to fix it.

Why is my iPhone saying no internet connection?

Before we proceed, we should explain what’s happening on your network when your iPhone is connected to Wi-Fi but says “No Internet Connection.” This requires knowledge of some home networking basics.

Wireless devices, like an iPhone, connect to your router. The router is a device that manages the network connections for the devices in your home. Your router plugs into a modem, a device that bridges the traffic on your home network to the wider internet.

When your iPhone says “No Internet Connection,” it means that your iPhone is connected to the router correctly, but can’t reach the internet.

This gives you some clues about the issue, as we explain below.

Fix Wi-Fi Connected But No Internet Access On iPhone

1. Confirm Other Devices Can’t Connect Either

Before you do any troubleshooting, it’s important to determine whether your iPhone is the only device with no internet connection. Grab your computer (or another device connected to your Wi-Fi network) and see if it’s online—try streaming a YouTube video to check.

On some Android versions, this problem is indicated by an X icon over the Wi-Fi symbol in your status bar (you’ll be connected to your mobile network for data). iPhone and iPad users can visit Settings > Wi-Fi and check for a “No Internet Connection” message under your network name.

If your iPhone won’t connect but other devices will, this is likely due to a misconfigured setting on your iPhone. But if you have no internet on every device, the problem lies with your Wi-Fi router and you can thus skip some of the iPhone-only steps below, as noted.

2. Reboot Your iPhone

This step isn’t necessary if your connection issue is affecting multiple devices.

As with many issues, rebooting your iPhone is the first troubleshooting step you should try. If you’re lucky, you might clear up any temporary bug by restarting, which will fix your iPhone network connection issue.

To reboot your iPhone, simultaneously press and hold the Side button and either Volume button. Drag the Slide to Power off slider from left to right to shut down your iPhone.

Wait a few seconds, then turn your iPhone on again by pressing and holding the Side button until the Apple logo appears on the screen.

3. Toggle Airplane Mode

Open Settings and tap the Airplane Mode toggle to turn it on, wait about 15 seconds, then tap the toggle again to turn it off. When Airplane Mode is enabled, your iPhone kills all wireless connections at once — Wi-Fi, Bluetooth, and cellular — and turning it back off forces your iPhone to reconnect to everything from scratch.

Screenshot showing airplane mode setting on iPhone

This works differently from toggling Wi-Fi on its own, because Airplane Mode clears the entire wireless stack rather than just one connection. If your iPhone had grabbed a bad network configuration or got stuck in a half-connected state (which is a lot more common than you’d think), this one toggle can shake it loose. You can also do this from Control Center by swiping down from the top-right corner and tapping the airplane icon, but using the Settings app is more reliable because Control Center sometimes leaves Wi-Fi on even in Airplane Mode.

4. Reboot Your Modem and Router

Since most network issues involve your modem and router, rebooting them is a wise early step. While some routers offer the option to reboot through their web interface, you don’t need to do this. Pull the power plug from both devices and leave them unplugged for a few minutes—or use the physical power button if there is one.

Power up the modem again first, letting it fully boot up before you plug in your router again. Wait a few minutes to make sure both are running. While doing this, confirm that your router and modem are working properly. If you don’t see any lights on one of the devices, or the lights appear red or flash in an irregular pattern, you may have a bad piece of network hardware.

If your iPhone says “No Internet Connection” even after this, continue—your issue is more complex than a basic reboot.

If your router broadcasts separate 2.4GHz and 5GHz networks, try connecting to the other one. A 5GHz connection is faster but weaker through walls, so if you’re far from the router, switching to 2.4GHz might give you a more stable connection. You’ll see both network names listed under Settings > Wi-Fi — they often have a suffix like “-5G” or “-2.4G” to tell them apart.

5. Check Your Date and Time Settings

Please make sure that the date and time on your iPhone are set correctly. Go to Settings > General > Date & Time. Turn on the toggle next to Set Automatically.

Date and time settings on iPhone

If the date and time on your iPhone are wrong — even by a few hours — it can cause SSL certificate validation to fail, which means your iPhone won’t be able to establish a secure connection to most websites and services. That’s why you’ll see “No Internet Connection” even though your Wi-Fi link to the router is perfectly fine. The problem tends to show up after a factory reset or after your iPhone’s battery has fully drained and been recharged.

6. Update Your iPhone Software

Go to Settings > General > Software Update and check whether a new version of iOS is available for your iPhone. If there is one, tap Download and Install.

iOS updates sometimes include fixes for Wi-Fi bugs that Apple introduced in a previous release, and this particular “No Internet Connection” issue has shown up repeatedly after certain updates — iOS 16.4, iOS 17.1, and iOS 18.5 all had reports flooding Apple’s support forums. If you can’t download the update over Wi-Fi (because, well, you have no internet), you can connect your iPhone to a computer with a USB cable and update through Finder on a Mac or the Apple Devices app on a PC. It’s a bit of a pain, but it’s worth checking off the list before moving on to more disruptive fixes.

7. Disable Any VPN Connections

Using a VPN has benefits, but it also adds a layer to your internet connection setup. As a result, what you think is an issue with your home network connection could be a problem with your VPN. Sometimes a VPN will time out if you’re connected for too long, or you could be using an overloaded server that can’t handle your connection.

If you’re running a VPN, whether through an app, a manual connection on your iPhone, or on your router, disable it and try to get online again. If the VPN is an app, just turn it off from within, but if it’s in the Settings app, follow the steps below:

Go to Settings > General > VPN & Device Management. Turn off the toggle next to Status at the top, changing it from Connected to Not Connected.

If that doesn’t fix it, keep the VPN turned off for the rest of your troubleshooting to reduce the number of variables.

If you don’t use a VPN on purpose, check this setting anyway. Some users on Apple’s forums have reported that a VPN profile left over from a deleted app — or from a work configuration — can silently interfere with your connection. You might see the VPN & Device Management toggle flickering on and off on its own, which is a dead giveaway. If there’s a VPN profile listed that you don’t recognize, tap the i icon next to it and tap Delete VPN.

8. Forget Your Wi-Fi Network And Reconnect

To forget a Wi-Fi network on your iPhone, open Settings and tap Wi-Fi. Then, tap on the information button (look for the blue i) to the right of the Wi-Fi network you want your iPhone to forget. Then, tap Forget This Network.

After forgetting the network, you can go back to Settings > Wi-Fi and tap on the network name again to reconnect. You’ll also have to reenter the Wi-Fi network’s password after forgetting it on your iPhone.

While you’re in the Wi-Fi settings for your network, check the Private Wi-Fi Address setting too. Since iOS 18, this is no longer a simple on/off switch — tap Private Wi-Fi Address and you’ll see three options: Off, Fixed, or Rotating. On most home networks with WPA2 or stronger security, iPhone defaults to Fixed. Try setting it to Off, then tap Rejoin when your iPhone asks. If that clears the “No Internet Connection” message, your router was having trouble with the randomized address, not your iPhone.

9. Disable Wi-Fi Assist

Go to Settings > Cellular, scroll all the way to the bottom of the screen, and turn off the toggle for Wi-Fi Assist.

Wi-Fi Assist is an iOS feature that automatically switches your iPhone over to cellular data when your Wi-Fi signal is weak, and Apple enables it by default. The problem is that when it kicks in while your Wi-Fi is technically connected but not passing traffic, your iPhone can get stuck bouncing between the two — it sees Wi-Fi, tries to use it, fails, switches to cellular, detects Wi-Fi again, and loops back. Turning it off forces your iPhone to commit to the Wi-Fi connection entirely, which makes it easier to tell whether the issue is actually with your Wi-Fi or somewhere else. You can always turn it back on once everything’s working again.

10. Change Your DNS Settings

Tap the information button (the blue i) next to your connected Wi-Fi network in Settings > Wi-Fi, scroll down and tap Configure DNS, switch it from Automatic to Manual, and enter 8.8.8.8 and 8.8.4.4 (Google’s DNS servers) or 1.1.1.1 and 1.0.0.1 (Cloudflare’s). Delete any existing DNS entries by tapping the red minus icon next to them.

DNS is what translates a website name like “apple.com” into the actual numerical address your iPhone needs to connect. Your router normally hands your iPhone the DNS servers from your internet provider, but if those servers are slow or temporarily down, your iPhone will act like it has no internet even though the connection itself is working. Switching to Google’s or Cloudflare’s DNS servers routes those lookups through a different path entirely, and in my experience this fix is the one that catches people off guard — the Wi-Fi is fine, the router is fine, but the ISP’s DNS was the bottleneck the whole time.

While you’re on that same Wi-Fi settings screen, you can also try forgetting the network and rejoining it, which forces your iPhone to request a fresh IP address from your router. (In older versions of iOS, there was a Renew Lease button that did this without forgetting the network, but Apple removed it back in iOS 15.) Grabbing a new IP can fix the problem if your iPhone was assigned an address that conflicts with another device on the network.

11. Check Your ISP’s Status

If you still can’t get any devices online, it’s worth checking if your internet service provider (ISP) is having an issue. Maybe the internet is down in your area. Though this is rare, it could explain why you have no internet access across devices. Contact your Internet service provider. It’s also possible your account has issues. Maybe you forgot to pay your bill and they disconnected your Internet. Simply contact them.

12. Reset Your Network Settings

If you’ve proceeded through all these steps and still have the “no internet access but connected” problem on your iPhone, there’s not much you can do other than reset your network settings.

If your iPhone is the only device you can’t connect with, you can reset its network settings by going to Settings > General > Transfer or Reset iPhone. Tap Reset, then Reset Network Settings.

This step resets Wi-Fi networks and passwords, cellular settings, and VPN and APN settings that you’ve used before. You’ll have to set everything up again, including VPN software, but it might be the fix you need.

If you’ve tried every fix on this list and your iPhone still says “No Internet Connection,” the next step is to contact your internet service provider and ask them to check for issues on their end — outages, account flags, and modem configuration problems are all things they can diagnose remotely and you can’t from your iPhone. If your ISP confirms everything is normal on their side, then it’s time to contact Apple Support or book an appointment at an Apple Store. There’s a small chance the Wi-Fi antenna in your iPhone has a hardware fault, and that’s something only Apple’s diagnostics can confirm. Whatever you do, don’t skip the ISP call and go straight to Apple — most of the time when nothing in this article works, the problem turns out to be on the provider’s end.

Contacts Not Showing on iPhone? Here’s The Real Fix

By Moses Johnson · March 27, 2026

Follow this guide to find out what to do if some of your contacts aren’t showing up on your iPhone.

Every time you want to contact someone in your contact list, a simple search should show their number. However, there are instances when some or all of your contact names don’t show up on your iPhone.

If contacts aren’t showing up on your iPhone, you can use this guide as a fix. But before we dive into the different options, remember that various problems can make your iPhone contacts disappear.

And therefore, there are various solutions that you can use to fix it. So, try each of these methods and see which one helps to restore contacts on your iPhone.

1. Restart Your iPhone

One of the first steps you should try when contacts are not showing up on your iPhone is to restart your phone. Sometimes when mobile devices run for a while, they may run into issues. Restarting your iPhone will help give it a fresh start and thus may help fix minor issues you’re facing, including contacts not showing up, sluggish performance, app crashes, and so on. Simply turn your iPhone off and back on. Once your iPhone is back up and running, confirm if your contacts have been restored. If not, move on to the next solution.

2. Resync Your Contacts With iCloud

If contacts are still not showing up on your iPhone, try resyncing your Contacts app with iCloud. We’ll do this by disabling iCloud access to Contacts and then re-enabling it again. Here’s how:

  1. Open the Settings app on your iPhone.
  2. Tap on your name at the top of the screen.
  3. Tap iCloud.
  4. Tap See All.
  5. Toggle off Contacts.
  6. Select Keep on My iPhone to save copies of synced contacts to your iPhone. You can also select Delete from My iPhone if you want. Don’t worry; this option doesn’t make your contacts disappear.
  7. Re-enable Contacts again. And if your iPhone asks to merge existing contacts, select Merge.

Resync Your Contacts With iCloud

After that, give your device a few minutes, then check to see if your contacts have been restored. If you’re still facing problems, read on for more solutions.

3. Show All Contacts in Your Phone App

Contacts might not show up on your iPhone because you have hidden some of them. You may not know this, but your iPhone usually places your contacts in groups based on your connected accounts. To see all your contacts, no matter their group, you need to ensure all groups are visible.

So, follow these steps to show hidden contact groups:

  1. Open the Phone app on your iPhone.
  2. Tap the Contacts tab.
  3. Tap Lists in the upper-left corner, then select All Contacts to view all your saved contacts.

Show All Contacts in Your Phone App

If some contacts from a particular account weren’t showing up on your iPhone, this should fix the issue. However, read on if you still don’t see all your contacts.

4. Update iOS on Your iPhone

Go to Settings > General > Software Update and install any available update. If one is waiting, tap Download and Install, enter your passcode, and let your iPhone finish before you check your contacts again.

Apple’s iOS updates regularly patch bugs that affect system apps, and the Contacts app gets caught up in these glitches more often than you’d expect — especially right after a major iOS release. If your contacts vanished after an update, or you’ve been ignoring that little red badge on your Settings icon for weeks, installing the latest version can quietly fix the whole thing. Make sure your iPhone has at least 50% battery (or plug it in) before you start the download.

5. Add All Your Accounts to Your iPhone

If you have several accounts that you use, chances are contacts might be saved across them. To fix this, you need to add all your accounts to your iPhone to ensure you have access to all your contacts. So, follow these steps to add an account to your iPhone:

  1. Open the Settings app on your iPhone.
  2. Scroll down and select Apps.
  3. Tap Contacts.
  4. Tap Contacts Accounts. You’ll see all accounts that are currently added to your iPhone.
  5. Tap Add Account, select the type of account, and log in using your credentials.

Add All Your Accounts to Your iPhone

After successful login, the account will appear under Settings > Apps > Contacts > Contacts Accounts.

If you don’t see any contacts from the newly added account, follow the steps in the next tip to ensure contact visibility.

6. Modify Your Contact Account Settings

Your Accounts settings also affect the visibility of your contacts. You need to ensure that all your connected accounts have Contacts sync enabled. To do this, follow these steps:

  1. Launch the Settings app on your iPhone.
  2. Scroll down and tap Apps.
  3. Tap Contacts.
  4. Tap Contacts Accounts. You will see all your connected accounts listed here.
  5. Tap each account and ensure Contacts is toggled on.

If contacts from one of your connected accounts weren’t showing up on your iPhone, this should help fix the issue.

Additionally, you can try disabling and enabling Short Name on your iPhone. While this feature is handy to ensure more names fit on the screen, it can sometimes be problematic. To do this, go to Settings > Apps > Contacts > Short Name. Disable Short Name, then wait about 15 seconds then turn it on.

While you’re in those settings, it’s also worth checking your Default Account. Go to Settings > Apps > Contacts > Default Account and make sure it’s set to the account where most of your contacts are stored — usually iCloud. If the default is set to a Gmail or Outlook account you barely use, new contacts you save might end up in an account that isn’t syncing properly, and older contacts tied to iCloud may not show up at all in certain apps like Messages or Phone.

7. Sign Out and Back Into Your iCloud Account

Go to Settings, tap your name at the top, scroll all the way down, and tap Sign Out. Choose Sign Out But Don’t Erase so your data stays on the device, then follow the onscreen prompts. Enter your device passcode or Apple Account password when asked, and tap Confirm and Sign Out.

Once you’re signed out, restart your iPhone and then sign back into your Apple Account through Settings. After signing in, give it a few minutes to sync everything. This is a step that fixes a different problem than the iCloud resync in step 2 — resyncing just refreshes the Contacts toggle, but signing out and back in forces your entire Apple Account connection to rebuild from scratch, which can clear up deeper sync errors that a simple toggle won’t touch. It takes a bit longer and you’ll need to re-enter your password, but if nothing else has worked so far, this is the one that tends to break the logjam.

8. Rebuild Your iPhone Contacts

Another way to troubleshoot contacts not showing up on iPhone issue is by force rebuilding them. To do this, you’ll have to edit one of your contacts first, then restart your iPhone. Here’s how:

  1. First, select any visible contact from the Phone app and select Edit in the top right.
  2. Add some new details—they don’t have to be accurate. You can add a fake email, address, note, or anything.
  3. Once done, tap Done in the top right and then restart your iPhone.

When your iPhone powers on, it will have to rebuild all the contact names and details. Once your iPhone restores all the contacts, you can delete the fake information you added to the contact above. Check if your contacts have been restored after a few minutes. If this doesn’t solve your issue, try data recovery tools.

9. Reset Network Settings

Go to Settings > General > Transfer or Reset iPhone > Reset > Reset Network Settings. Enter your passcode when prompted, and your iPhone will restart on its own.

This one won’t delete your contacts, photos, or apps — but it will wipe every saved Wi-Fi password, Bluetooth pairing, and VPN configuration on your device. That’s why it sits this far down the list. Your iPhone syncs contacts over the network, and if something in the connection stack is corrupted or stuck (which is more common than people think, particularly after switching between Wi-Fi and cellular on a spotty connection), the sync between your iPhone and iCloud can quietly stall. Resetting the network settings forces iOS to rebuild all of those connections from the ground up, and once your iPhone reconnects to Wi-Fi, it’ll attempt a fresh contact sync with iCloud. You will need to re-enter your Wi-Fi passwords afterward, so make sure you have them handy before you start.

10. Recover Lost Data Using iCloud or Data Recovery Tools

Before you try third-party data recovery tools, we advise using iCloud first.

  1. Sign in to iCloud.com with your Apple Account.
  2. Scroll down to the bottom of the page and click Data Recovery.
  3. Click Restore Contacts. Available versions are listed by the date and time they were archived.
  4. To the right of the version you want to restore, click Restore.

There may be more versions than can be displayed. Scroll to see them all.

Note: Wait until iCloud finishes restoring your contacts before you change them. During the restore process, any changes you make aren’t saved.

Tip: If you recently deleted a contact either from iCloud.com or your iPhone, it may take up to 24 hours for the archive to appear.

If that doesn’t work, you can try using third-party data recovery tools to restore your contacts. There are a variety of affordable tools on the market for the job.

11. Seek the Help of Apple Support

If all else fails or you don’t want to spend money on third-party data recovery tools, you can get tech support with the Apple Support app for more assistance.

Alternatively, you can reach out to them via Apple’s support website. Either way, a certified expert should help sort out the issue in more ways than we could.

If you’ve gone through every step in this guide and your contacts are still missing, the problem may not be something you can fix on your own. A corrupted iCloud sync on Apple’s server side, an account-level issue, or even a rare iOS bug that hasn’t been patched yet could be behind it — and Apple Support has tools to diagnose those things that aren’t available to you or me. When you contact them, mention which steps you’ve already tried so they don’t walk you through the same fixes again.

Restore Missing Contacts on Your iPhone

Contacts not showing up on iPhone issue has been reported by many users. If it has also happened to you, don’t panic. There are a variety of ways to fix the problem. In summary, you could restart your iPhone, resync with iCloud, show all contacts in your Phone app, add all accounts to your iPhone, modify account settings, or force rebuild your contacts.

If none of these solutions work for you, you can try restoring lost contacts from your iCloud backups. If that fails, make sure to contact Apple’s support team for further help. Using third-party data recovery tools should be your last resort, as you will certainly have to pay for it. Hopefully, one of the free methods works for you.

Call Failed on iPhone? Here’s Why and Fix!

By Moses Johnson · March 26, 2026

A call failed message could be a problem with your cellular provider or your iPhone.

You should toggle Airplane mode, restart your phone, and reset your SIM card.

You can also reset your iPhone’s network settings, but that will erase passwords.

Enabling Wi-Fi Calling can fix calls that fail due to a weak cellular signal.

Check that Do Not Disturb and Call Forwarding aren’t silently blocking your calls.

There you are, about to make an important call when your iPhone suddenly flashes the dreaded “Call Failed” message. Your heart sinks, and frustration kicks in. What went wrong?

Why Does My iPhone Say Call Failed?

When your iPhone keeps showing a “Call Failed” message, it usually means the device couldn’t maintain a connection with the cellular network. This could be due to a wide range of issues—from a weak signal to iOS glitches.

Common reasons why your iPhone says “Call Failed”:

  • Signal dropped.
  • Network congestion.
  • Problem with cellular network.
  • SIM card issues.
  • Problem with the Phone app.
  • Carrier-related problems.
  • iOS glitch.
  • Do Not Disturb or Focus mode silencing incoming calls.
  • Call forwarding pointing to an unreachable number.

How to fix “Call Failed” on iPhone

If you’re trying unsuccessfully to place a call, here are the most common ways to fix the call failed error on an iPhone:

Try your call again

The first thing you should do when you encounter “Call Failed” error on your iPhone is to try making the call again. Often, a call will fail thanks to a temporary signal drop, and the call will work just fine a minute later. Before you do anything else, tap the dial button to redial your last number.

Close All Of Your Apps

It’s possible the call failed on your iPhone because of a glitch with the Phone app. Closing and reopening the app can fix a minor software glitch. We recommend closing all of your apps, just in case a different apps has crashed in the background.

  • Open the app switcher by double-pressing the Home button (iPhones without Face ID) or swiping up from the very bottom of the center of the screen (iPhones with Face ID).
  • Swipe your apps up and off the top of the screen.
  • Open the Phone app again and try making a call. If the call still fails, move onto the next step.

Turn Airplane Mode On And Off

One of the most common reasons a call fails on your iPhone is because of a glitch with your cellular connection. You can fix this by turning Airplane mode on and off.

  • Go to Settings.
  • Turn on Airplane Mode.
  • Wait five seconds.
  • Turn off Airplane Mode.

Screenshot showing airplane mode setting on iPhone

Enable Wi-Fi Calling

If calls keep failing, go to Settings > Apps > Phone > Wi-Fi Calling and turn on Wi-Fi Calling on This iPhone.

Wi-Fi calling setting on iPhone

Wi-Fi Calling sounds like a minor setting, but it’s one of the more reliable fixes for this specific problem. Not all carriers support it. Check with your provider if the toggle isn’t showing — some require you to call in and activate it on your account before it appears (which is more common than you’d think).

Wi-Fi Calling routes calls through your internet connection instead of the cellular network. In weak-signal spots — basement apartments, thick-walled buildings, rural stretches with spotty LTE — this is often the only fix that works.

Try moving your location

It’s possible that you’re in a location that has poor service — good enough that your phone thinks it has cellular service, and you’ll see a bar or two of signal strength at the top of your phone — but bad enough that it can’t actually complete a connection. Try to make a call in another location. If you’re indoors, go outside, or otherwise try to change your location and make a call.

Turn Off Do Not Disturb

If you’re having trouble receiving calls rather than making them, go to Settings > Focus > Do Not Disturb and make sure it’s switched off. It’s easy to miss. Long-pressing the crescent moon icon in Control Center — or even just an accidental swipe through that menu — is all it takes to switch it on without realizing it.

Do not disturb settings on iPhone

Do Not Disturb silences incoming calls (it’s the feature’s entire purpose), and from the caller’s side that’s completely indistinguishable from a call failure.

Turn Off Call Forwarding

Turn off call forwarding by going to Settings > Apps > Phone > Call Forwarding. It’s worth a look. If it’s on and pointing to a number that’s unreachable, disconnected, or just no longer active, your iPhone will route every single call there first — and fail every time without any explanation.

Call forwarding is one of those settings most people never touch (some people don’t even know it exists), which means it can be on for months without anyone realizing.

Restart your iPhone

The next step you can take if your iPhone call failed is to restart your device. Restarting your iPhone can fix a variety of small issues by allowing of its programs to shut down naturally. Simply turn your iPhone off, wait a minute, and then turn it back on again.

If a standard restart doesn’t help, try a force restart: press and release Volume Up, press and release Volume Down, then press and hold the Side button until the Apple logo appears. This clears more from memory than a standard restart and can sometimes fix connection issues that a normal shutdown won’t.

Check For A Carrier Settings Update

Carrier settings updates can help improve the connection between your iPhone and wireless carrier’s network. It’s a good idea to immediately update the carrier settings when an update becomes available.

You’ll typically receive a pop-up on your iPhone when a carrier settings update is available. Tap Update if you see that notification.

You can manually check for a carrier settings update by connecting your device to the internet and following these steps:

  • Go to Settings.
  • Tap General.
  • Tap About.
  • A pop-up will appear if a carrier settings update is available. Tap Update if it does.
  • If no pop-up appears, move onto the next step.

Check For An iOS Update

Apple routinely releases iOS updates to fix known bugs and occasionally introduce new features. We recommend installing new iOS updates and see if that will fix your problem.

  • Go to Settings.
  • Tap General.
  • Tap Software Update.
  • Tap Update Now if an update is available.

Eject And Reinsert The SIM Card

If your iPhone has a physical SIM card, there’s a chance that there’s a problem with the way the SIM card is seated in its tray, and the phone can have trouble reading all the contacts on the card. Ejecting and reseating the SIM card can help fix this problem.

As long as you are careful, it’s not hard to eject the SIM card from your iPhone. Switch off your phone first. Then, use the SIM ejector tool to push into the hole beside the SIM tray to release it. Take out the SIM card and check for damages before putting it back in properly.

If your iPhone is an iPhone 14 or later bought in the United States, there’s no physical SIM card slot — it uses an eSIM embedded directly in the chip instead. Your carrier can sort out most eSIM issues remotely, so give them a call and ask them to check the status of your line.

Reset your network settings

If you’ve tried everything else and your iPhone can’t complete any phone calls due to the Call Failed error, we recommend that you reset your phone’s network settings.

Save this as a last resort, because this troubleshooting step will erase all your network settings. This means you’ll have to reenter your Wi-Fi passwords and reconfigure any virtual private networks on your iPhone. It’s a little bit of an inconvenience, but it can fix the problem when calls fail on your iPhone.

  • Go to Settings.
  • Tap General.
  • Tap Transfer or Reset iPhone.
  • Tap Reset.
  • In the pop-up menu, select Reset Network Settings.
  • Enter your iPhone’s Passcode.
  • Select Reset Network Settings to confirm your decision.

Contact your carrier

Before you call, check whether your carrier is experiencing a service outage in your area — most carriers have a status page on their website and an outage checker built into their app. If there is an outage, there’s not much anyone can do until the carrier resolves it on their end.

If resetting network settings didn’t work, it’s time to contact your wireless carrier for assistance. Since calls are failing, you might need to visit the carrier’s store. There might be an issue with your account only a customer support representative can resolve.

iPhone Call Failed Problem: Fixed!

If your carrier comes up empty and calls are still failing on your iPhone, contact Apple Support. You can reach them at apple.com/support, by phone (the Apple Support app makes this especially easy), or by booking a Genius Bar appointment at your nearest Apple Store. Getting a diagnosis costs nothing. Should Apple’s diagnostics find a problem with your iPhone’s cellular radio, they can arrange a repair or replacement — not the most common outcome here, but worth knowing you have that option.

You’ve fixed the problem and your iPhone calls aren’t failing anymore. Share this article on social media to teach your friends and family what to do if calls fail on their iPhone. Thanks for reading.

Auto-brightness Not Working on iPhone? Here’s The Real Fix

By Kevin Shaw · March 26, 2026

Auto-brightness means you shouldn’t need to change your iPhone screen brightness yourself. Here’s what to do if it isn’t working.

Auto-brightness ensures your iPhone’s screen brightness levels adapt automatically according to the light around you. For example, when you step out in the sun, the brightness increases. And inside a room, it decreases. When your iPhone auto-brightness feature doesn’t work, it can spoil your user experience and even consume more battery.

If auto-brightness isn’t working on your iPhone, you can use these solutions to fix it. Once that’s done, it should be more comfortable to use your iPhone during the day, night, and any other times.

  • Clean the ambient light sensor at the top of your iPhone screen
  • Restart your iPhone, or force restart it if a regular restart doesn’t help
  • Toggle Auto-Brightness off and back on in Settings > Accessibility > Display & Text Size
  • Update iOS in Settings > General > Software Update
  • Turn off Low Power Mode in Settings > Battery > Power Mode
  • Turn off Night Shift and check True Tone in Settings > Display & Brightness
  • Disable Attention Aware Features in Settings > Face ID & Passcode (Face ID iPhones only)
  • Let your iPhone cool down if it’s been running hot
  • Remove a thick screen protector or case that covers the sensor area
  • Reset All Settings in Settings > General > Transfer or Reset iPhone

1. Clean Your iPhone’s Front Screen Area

The ambient light sensor is at the top of your iPhone screen. Body oils, sweat, and other such gunk may stick to this sensor when holding the phone to your ear during long calls. Due to this, it may stop your iPhone’s ambient light sensor working, which is what’s responsible for adjusting the screen brightness according to your surroundings.

To fix this, use a clean, dry cloth to wipe the top portion of your iPhone screen. After this, auto-brightness should work fine. If not, move on to the next solution.

2. Restart Your iPhone

If you haven’t turned off your iPhone in a while, it can cause a few problems, like auto-brightness not working correctly. To fix this, simply restart your iPhone. After the device powers on, everything should work as well as it usually does.

If a regular restart doesn’t fix it, try a force restart. Press and quickly release Volume Up, then press and quickly release Volume Down, then press and hold the Side button until the Apple logo appears on screen.

3. Enable and Disable Auto-Brightness

Another quick solution to fix the auto-brightness problem on your iPhone is to turn this feature off and on. Here’s how to do that:

  1. Open the Settings app.
  2. Tap Accessibility.
  3. Tap Display & Text Size.
  4. Turn off Auto-Brightness.
  5. Restart your iPhone.
  6. Go to Settings > Accessibility > Display & Text Size and enable Auto-Brightness.

Screenshot showing auto brightness settings on iPhone

4. Update Your iPhone

Auto-Brightness is a native iOS feature, so it’s also important to make sure that the iPhone is running smoothly. The best way to do this is to install the latest iOS software.

To update your iPhone, go to Settings > General > Software Update. If an update is available, tap Update Now.

Software update screen on iPhone

5. Turn Off Low Power Mode

Go to Settings > Battery > Power Mode and check that Low Power Mode is switched off. When it’s on, iOS automatically caps your screen’s maximum brightness — and that happens even if the auto-brightness feature is otherwise working correctly.

Screenshot showing Low Power Mode settings on iPhone

This one catches a lot of people off guard. Annoyingly, it kicks in automatically when your battery hits 20% (and again at 10%, whether you meant it to or not) — so you can end up running around for hours with a dimmed screen and never connect the dots. It stays on until you manually switch it off, or until your battery climbs back to 80%. Worth a quick check.

6. Try Turning Off Night Shift

We’ve heard from people who said they had success fixing iPhone Auto-Brightness problem by turning off Night Shift. Here’s how to turn off Night Shift on your iPhone:

  1. Open the Settings app.
  2. Tap Display & Brightness.
  3. Tap Night Shift.
  4. Turn off Manually Enable Until Tomorrow and Scheduled.

Screenshot showing Night Shift settings on iPhone

7. Check True Tone

Go to Settings > Display & Brightness and toggle off True Tone. This feature adjusts both the color temperature and the brightness of your screen based on the light around you, which can make it look like auto-brightness has stopped working when True Tone is actually the one changing things.

On iPhone 8 and later — meaning every current iPhone model — True Tone switches on by default. It’s great, usually. Adjusting your display’s color temperature to match the room is what it was built for, and under normal conditions you barely notice it running. When something goes wrong with the sensors it reads from, your screen can end up looking warm and dim all the time — which a lot of people mistake for auto-brightness breaking on them.

8. Disable Attention Aware Features

If your iPhone has Face ID, go to Settings > Face ID & Passcode, enter your passcode, and turn off Attention Aware Features. This feature uses the TrueDepth camera to detect whether you’re actually looking at the screen, and when it thinks you’ve glanced away, it dims the display to save battery.

Attention aware of features on iPhone

At first, you might not notice. Attention Aware was designed as a battery-saving measure, and for most people it works fine, but there are iPhones — especially older ones, or iPhones that have been through a screen repair — where the camera sensor reads “not looking” far more often than it should, leaving the display stuck at a lower brightness than you set. Turning it off removes one more variable from the equation.

9. Let Your iPhone Cool Down

If your screen has gone dim and none of the previous steps have helped, set your iPhone down in a cool, shaded spot and leave it alone for about five minutes. Overheating is often the culprit. When the iPhone detects that its internal temperature has climbed too high, it dims the screen automatically as a protective measure — and that can happen during long GPS navigation sessions, extended gaming, or even wireless charging in warm weather.

Apple doesn’t let you disable this behavior — it’s a hard limit built into iOS. Running Apple Maps with the screen at full brightness in direct sunlight is probably the most common trigger (especially in summer, or if the iPhone is also charging at the same time), but gaming, video streaming, and long FaceTime calls can push things to the same point. Let it cool down for five minutes and the screen should come back to normal on its own. If it’s still dim after that, or if the phone feels warm even when it’s been sitting idle, that’s a sign something else is going on and it’s worth a trip to the Apple Store.

10. Remove Any Thick Screen Protectors

iPhone displays are very sensitive. If you are using an abnormally thick screen protector on your iPhone, it’s possible that it’s causing problems with the smooth working of the ambient light sensor. To address this, consider removing your screen protector. If you must use one, opt for a screen protector that’s thinner, or medium thickness, instead.

Similarly, if you have a case that covers the entire front of the device, or even partially blocks the top sensor area, remove that as well.

11. Reset All Settings

When you reset all settings, personal data like downloaded apps, music, photos, videos, and such won’t be deleted. However, all the settings you have customized to your liking will reset and return to the default options. This includes Wi-Fi, Bluetooth, VPN configurations, Home Screen layout, keyboard settings, and more.

After you reset all your settings, several problems such as auto-brightness not functioning should be fixed. Here’s how to do it:

  1. Open the Settings app.
  2. Tap General.
  3. Tap Transfer or Reset iPhone.
  4. Tap Reset.
  5. Tap Reset All Settings.
  6. Enter your device passcode to confirm.

Once it completes, your iPhone should adjust the screen brightness correctly based on the light around you.

Problems With Third-Party iPhone Displays

Did you break your iPhone screen and get it replaced at by an unauthorized service provider? If yes, it may cause multiple problems, like Face ID not working correctly, True Tone not functioning, and possible auto-brightness issues.

Reach out to Apple support for repair options. Apple offers mail, phone, online, and in-person help. Make sure to schedule an appointment if you plan on going into your local Apple Store!

Auto-Brightness Makes Your iPhone Easier on the Eyes

After following the above fixes, your iPhone display should automatically adjust the screen brightness to match your environment, ensuring that the screen is always comfortable to look at.

If auto-brightness still doesn’t work on your iPhone, you may want to turn off auto-brightness and adjust it manually until you get your device inspected at an Apple Store instead.

If none of the above have solved it, reach out to Apple Support before booking an in-person visit — they can run a remote diagnostic on your device and determine whether the ambient light sensor is even responding. Go to support.apple.com to get started. Persistent auto-brightness issues that survive a Reset All Settings and a software update almost always point to a hardware fault with the sensor, and that’s something only Apple or an Apple Authorized Service Provider can properly diagnose and repair.

FaceTime Not Working on iPhone? Here’s The Real Fix!

By Moses Johnson · March 25, 2026

  • If FaceTime is not working on your iPhone, there may be many reasons why, some of which are out of your control.
  • Before troubleshooting, you should check for certain factors, such as whether or not there’s a FaceTime outage.
  • Try restarting your iPhone and force closing FaceTime before moving on to more involved fixes.
  • If basic fixes don’t work, try signing out of FaceTime, resetting your network settings, or checking your camera and microphone.
  • Otherwise, there are several ways you can troubleshoot to get the app back up and running.

If FaceTime is not working on your iPhone, don’t worry, there are a lot of things you can do to try and fix it. You just have to know where to start.

Here’s a breakdown of why your FaceTime app is not working on your iPhone, and troubleshooting tips to try.

How to troubleshoot when FaceTime isn’t working on iPhone

Make sure you have a working internet connection

The first thing you should do when FaceTime is not working on your iPhone is to make sure that your phone is connected to Wi-Fi or your wireless carrier’s cellular data network, and that you can access the internet.

If you are trying to use FaceTime over Wi-Fi, go into your Settings and turn Wi-Fi off and then back on again.

If you’re trying to use FaceTime over cellular, make sure that cellular data is on. Go to Settings and tap Cellular or tap Mobile Data, then turn on Cellular Data. Then scroll down to the Cellular Data section, and make sure FaceTime is enabled for cellular use in the list of apps.

You should also make sure that you are using a fast internet connection to avoid sound quality issues with FaceTime. If your cellular connection or Wi-Fi network runs slowly, or other people stream audio or video on the same Wi-Fi network, you might have these issues:

  • Connection alerts or unable to connect
  • Choppy video calls
  • Black screen
  • Dropped calls

Make sure that both you and the person that you FaceTime with use a fast Wi-Fi or cellular connection.

If you’re on a work or school network that uses a firewall, FaceTime may be blocked at the network level. FaceTime relies on specific ports to connect — and some corporate firewalls restrict those by default. You can ask your network administrator to check Apple’s support page on using FaceTime behind a firewall, or try switching to a personal Wi-Fi or cellular connection to see if that fixes the problem.

Restart your iPhone

Press and hold the Side Button and either Volume button until the power-off slider appears on your screen, then drag the slider to turn your iPhone off. Wait about 10 seconds, then press and hold the Side Button again until you see the Apple logo.

Restarting clears out temporary glitches that pile up in the background — things like stuck network processes or misbehaving app states that you’d never notice until something like FaceTime refuses to connect. It sounds almost too basic, but a restart fixes FaceTime issues more often than most people expect. If your calls have been dropping, lagging, or producing that robotic audio distortion (and I do mean robotic, not just a little choppy), a fresh reboot is the fastest thing to try before you go digging through settings.

Update your iPhone’s software

If you experience issues with receiving a FaceTime call after set up, update your iPhone to the latest version of iOS. Go to Settings > General > Software Update, then install any pending updates. See this article if you can’t update your iPhone.

Software update screen on iPhone

Check that FaceTime is turned on

Go into your iPhone’s Settings app, tap Apps, tap FaceTime, and make sure that the toggle next to FaceTime is enabled.

Screenshot showing FaceTime settings on iPhone

If FaceTime says “Waiting for activation,” turn FaceTime off, restart your phone, then turn FaceTime back on. It might take up to 24 hours for your carrier to verify your phone number with Apple. Contact your carrier to make sure that you can send and receive SMS messages and wait up to 24 hours after you try the troubleshooting steps above.

If you’re using an iPhone with both an eSIM and a physical SIM (or two eSIMs), make sure the phone line you want to use with FaceTime is selected and turned on. Go to Settings > Cellular, and check that the correct line is active. A deactivated or misconfigured SIM — even an old one you’re not using anymore — can interfere with FaceTime activation in ways that aren’t obvious at all.

If you aren’t seeing FaceTime at all, go from the Settings app to Screen Time, and then Content & Privacy Restrictions, followed by Allowed Apps & Features. Then make sure both the camera and FaceTime are allowed by that device.

Make sure you’re signed in

To use FaceTime on your iPhone, you need to be signed in with your Apple Account email address or phone number. You can check this by going to Settings > Apps > FaceTime and making sure that below You Can Be Reached By FaceTime At, your phone number or Apple Account email address are selected.

Sign out of FaceTime and sign back in

Go to Settings > Apps > FaceTime, tap your Apple Account at the top, then tap Sign Out. Restart your iPhone, go back to that same screen, and sign in again with your Apple Account.

Screenshot showing FaceTime sign out screen on iPhone

This does something a little different from toggling FaceTime off and on. When you sign out completely, you’re forcing your iPhone to re-establish its connection with Apple’s FaceTime servers from scratch — refreshing your authentication, your registered phone number, and your email addresses all at once. It’s the kind of fix that tends to work when FaceTime has been stuck in a weird half-connected state for days, where calls fail but the app doesn’t give you a clear error message.

Make sure your date and time settings are correct

We recommend checking your iPhone’s Date & Time Settings. FaceTime won’t work on your iPhone if the date and time are incorrect, especially if your device thinks it is in the future.

Go to Settings > General > Date & Time. Then, turn on the switch next to Set Automatically if it’s not on already.

Date and time settings on iPhone

Check if FaceTime is down

There’s a chance that FaceTime is down on Apple’s end. Check Apple’s System Status page to learn whether FaceTime is experiencing a service outage.

Force close and reopen FaceTime

Swipe up from the bottom of your screen and pause in the middle to open the App Switcher, find the FaceTime app card, then swipe it up and off the screen to close it. Wait a few seconds and open FaceTime again.

iPhone App Switcher

If FaceTime froze mid-call, gave you a black screen, or just stopped responding after you answered, force closing the app can clear the problem without restarting your entire phone. This is different from a restart — you’re only killing the FaceTime process itself, which takes about 3 seconds and doesn’t affect anything else. It won’t help with deeper issues like activation errors or network problems, but for a FaceTime app that’s acting glitchy or unresponsive, it’s the quickest thing to try.

Check your iPhone’s camera and microphone

Open the Camera app and make sure it captures video on both the front and rear cameras, then open Voice Memos, record a short clip, and play it back to confirm the microphone is picking up sound.

If you can see yourself in FaceTime but the other person can’t see or hear you — or the reverse — the issue might not be with FaceTime at all. A camera or microphone that isn’t producing anything points to a hardware problem rather than a software one, and no amount of toggling settings or restarting will fix damaged hardware. On the other hand, if both the Camera app and Voice Memos work perfectly fine, you know for certain the issue is specific to FaceTime or your connection, which narrows things down quite a bit.

Figure out whether the problem is on your end or someone else’s

Keep in mind that FaceTime problems can be caused by a problem with your iPhone — or with the person you’re trying to call.

Does FaceTime not work with anyone or just one person? If necessary, call several people and see whether the problem is limited to one person or to everyone.

Here’s a helpful rule of thumb: If FaceTime is not working with anyone, it’s probably a problem with your iPhone. If it doesn’t work with just one person, it’s probably a problem on the other person’s iPhone, iPad, or Mac.

If FaceTime won’t connect to one specific person, check whether you’ve accidentally blocked them. Go to Settings > Apps > FaceTime, scroll down to Blocked Contacts, and look for their name. Blocking someone stops FaceTime calls in both directions, and it’s surprisingly easy to block a contact by mistake.

You should also check whether Focus mode or Do Not Disturb is turned on. When Focus is active, incoming FaceTime calls may be silenced or blocked entirely depending on how your Focus filters are set up. Open Control Center and look for the Focus icon — if it’s highlighted, tap it to turn it off and try the call again.

Reset your network settings

Go to Settings > General > Transfer or Reset iPhone, tap Reset, then tap Reset Network Settings. You’ll need to enter your passcode to confirm.

Save this one for when the easier fixes haven’t worked, because resetting your network settings wipes out all of your saved Wi-Fi passwords, VPN configurations, and Bluetooth pairings. Your iPhone has to reconnect to everything from scratch afterward. But if FaceTime stopped working after a software update or after you switched carriers (which is a lot more common than you’d think), corrupted network settings are very, very often the cause. Once the reset is done and your iPhone restarts, reconnect to your Wi-Fi and try FaceTime again.

Check whether a FaceTime feature is available

Even if both you and the person you’re trying to contact have a FaceTime account, that may not be all of the story. FaceTime and FaceTime audio calling are not available for all countries, regions, or carriers.

You can check Apple’s website to learn which countries and carriers do and do not support FaceTime. Unfortunately, If you’re trying to use FaceTime in an unsupported area, there’s nothing you can do to make it work.

If nothing has worked

If you’ve gone through every step above and FaceTime still won’t work on your iPhone, the problem may be something you can’t fix on your own. Contact your wireless carrier first — activation issues, account restrictions, and SMS verification problems all fall on their side, and they can check things that aren’t visible to you in your iPhone’s settings.

If your carrier confirms everything looks fine on their end, your next step is Apple Support. You can reach them through the Apple Support app, by phone, or by scheduling a visit at an Apple Store. There’s a chance the issue is hardware-related — a failing cellular antenna or a damaged microphone won’t show up in any settings menu — and Apple’s diagnostics can catch problems that troubleshooting steps can’t.

As an absolute last resort, you can try resetting all settings on your iPhone by going to Settings > General > Transfer or Reset iPhone > Reset > Reset All Settings. This won’t erase your photos, apps, or data, but it will reset every preference on your phone back to factory defaults — Wi-Fi passwords, wallpaper, notification settings, all of it. It’s a pain to set everything back up, but it can resolve deep software issues that individual fixes miss.

iPhone Won’t Update? Here’s The Real Fix!

By Stacey Butler · March 25, 2026

Having problems updating your iPhone to the latest version of iOS? There are a few reasons why you can face these issues. Don’t be disheartened, though—there’s usually a simple solution to the problem.

Let’s look at some fixes that will help you get the latest iOS running on your iPhone properly. Here’s how to fix your iPhone when it won’t let you update iOS.

Software update screen on iPhone

1. Check Device Compatibility

Go to Settings > General > About and check the Model Name at the top of the page. iOS 26 requires an iPhone 11 or later — which also means the iPhone XR, iPhone XS, and iPhone XS Max are out, even though those don’t feel that old. There’s nothing broken. If you have one of those devices and can’t see the update, that’s Apple’s compatibility cutoff, not a problem you can fix.

About settings on iPhone showing model name

Apple cuts off support for older iPhones (and I do mean cuts off, not gradually winds down) when those devices no longer have the processing power or memory to run the new iOS reliably. There’s some nuance, though. If you’re on an older device, Apple still issues security patches for a while after it stops the big feature updates — so your phone isn’t completely abandoned the moment the major updates end. The security support window can last a few years after the major iOS cutoff. On that hardware, there’s no workaround to get the new features or design changes — and if your iPhone genuinely can’t handle the new iOS version, that’s the right call.

2. Charge Your iPhone

As you probably know, your iPhone won’t let you upgrade if you don’t have enough battery power. This is to prevent your device from shutting off in the middle of an update, which can cause serious problems.

Make sure you plug in your iPhone and have plenty of battery charge before starting the iOS update. It’s a good idea to leave it on the charger while the process runs, too. That way, if it takes longer than expected, your phone won’t run out of power.

3. Make sure your phone has access to Wi-Fi

Your iPhone won’t update if it doesn’t have a Wi-Fi connection.

Make sure you’re connected to a reliable Wi-Fi network when you try to update. Some updates, because they are so large, require a Wi-Fi connection. We recommend using Wi-Fi instead of cellular data when downloading updates, as it’s faster and won’t eat into your data plan.

Open Settings and tap Wi-Fi. Make sure the switch next to Wi-Fi is on, and that a checkmark appears next to the name of your Wi-Fi network.

The best way to ensure your iPhone can update is by performing the update at home or in an office where you have access to a reliable Wi-Fi network.

It’s worth restarting your router if you haven’t done so in a while. If you have continued issues, you might also try connecting to another network and seeing if you have the same issue there.

4. Ensure you have enough available storage

Next, check if your iPhone has enough room to store the update.

Go to Settings > General > iPhone Storage. In this menu, you’ll see how much storage you have used and remaining. Depending on what’s taking up space, your phone will provide a few recommendations, including:

  • Offload Unused Apps
  • Review your photos and videos

iPhone storage screen showing available storage space

Let’s look at what these do.

Offload Unused Apps deletes the install data for any apps that you rarely use. This won’t delete any of your personal files; only the app data itself is deleted. When you want to use the app again, you can redownload it as long as it’s still available on the App Store.

Review your photos and videos lets you review your media files including screenshots, duplicates so you can delete items you don’t need. This is often an easy way to gain a big chunk of storage, especially if you have stored a lot of videos and photos on your iPhone.

As a general target, minor iOS updates (like 26.0 to 26.1) typically need around 5–6 GB of free space to install. A major version jump — moving from iOS 18 to iOS 26, for example — can require closer to 20 GB during installation, even if the final update file itself is much smaller. If you’re close to the limit, consider doing the update through your computer instead, where the storage math works out differently.

Once you’ve increased your free space, try the iOS update again.

5. Wait a While Before Updating

When Apple releases a new iOS update, millions of people are connecting their iPhones to Apple servers to download and install it. With all those people connecting simultaneously, Apple’s server may struggle to keep up, which could be the reason why your iPhone won’t update.

If you receive an error when trying to update to the latest version of iOS, try waiting for a while. You should have better luck later when the update servers aren’t under as much strain.

The update menu lets you schedule a system update to run overnight, when most people in your area won’t be trying to update. Try that, and if it doesn’t work either, visit Apple’s website to see if their servers are working properly.

Apple maintains a System Status page at apple.com/support/systemstatus that shows the real-time health of every Apple service, including Software Update. Check it before you spend an hour troubleshooting. If you see yellow next to Software Update, nothing you do on your iPhone is going to fix it — that’s Apple’s problem to fix, not yours.

6. Restart your iPhone

If your phone hasn’t been restarted in a while, there could be a glitched app or other temporary issue preventing the update from occurring.

Rebooting a computer can resolve a lot of problems, and your iPhone is no exception to this rule. Simply turn your iPhone off and back on, then try to update again.

7. Remove a Beta Profile

If you’re enrolled in Apple’s beta testing program — or if you were enrolled at some point and forgot to unenroll — your iPhone may be stuck waiting for a beta update instead of the public release. Go to Settings > General > VPN & Device Management. If you see a beta profile listed (it’ll say something like “iOS Beta Software Profile”), tap it, then tap Remove Profile and restart your iPhone. It takes about ten seconds. After that, go back to Settings > General > Software Update to check for the regular update.

Beta profiles are what tell your iPhone to check Apple’s beta update servers instead of the standard release servers. When you have one installed and the beta cycle ends — which happens when Apple pushes the full public release — your iPhone can get stuck in a very, very strange state: it keeps reporting that an update is available but won’t actually install it, and the Software Update screen offers no useful explanation for why. Tracking down that type of problem without knowing to look for a beta profile can take a long time. If you removed the profile and restarted, go back to Settings > General > Software Update and check again — the regular iOS update should now appear.

8. Update your iPhone using your computer

While most people are used to updating iOS right on their iPhone, you can still run a system update through your computer with iTunes or Finder. It’s not quite as convenient, but can come in handy if the over-the-air update isn’t working for you. This is also a solution if you can’t create enough free space on your device.

  1. Connect your iPhone and your computer with a cable.
  2. Do one of the following:
    • On a Mac (macOS 10.15 or later): In the Finder sidebar, select your iPhone, then click General at the top of the window.
    • On a Mac (macOS 10.14 or earlier) or a Windows device: Open the iTunes app, click the button resembling an iPhone near the top left of the iTunes window, then click Summary.
  3. Click Check for Update.
  4. To install an available update, click Update.

9. Delete Old Update Data

If you try to install an iOS update and it fails, the update data sits on your device so you don’t have to re-download it. But if there’s something wrong with what you downloaded, you need to delete it to force your iPhone to run the update again.

To do this, go to Settings > General > iPhone Storage, check to see if the update has already downloaded. Scroll down the list of apps below the Storage Recommendations and look for an iOS update. If you see the update file, tap on it, then tap Delete Update.

Now that the iOS update is deleted, go to Settings > General > Software Update to download the update again.

10. Reset Network Settings

If you still can’t update your iPhone, reset your network settings to start fresh. Note that this will clear out all network preferences you’ve saved, so you’ll need to reconnect to all previously saved Wi-Fi networks again. This will also reset any VPN configurations you use.

Before you do the full network reset, though, check whether you have an active VPN or proxy on your iPhone (a VPN can block Apple’s update servers just as effectively as a broken connection). Try that first. If turning the VPN off doesn’t fix the update, go to Settings and tap VPN & Device Management to remove the VPN profile entirely, then try the reset steps below. Some VPN apps reroute your iPhone’s traffic through servers that can’t reach Apple’s update process.

To reset network settings on your iPhone:

  1. Open Settings and tap General.
  2. Scroll down to Transfer or Reset iPhone.
  3. Select Reset at the bottom, followed by Reset Network Settings.
  4. Enter your passcode and confirm you want to do this.

Once you reset your Wi-Fi configuration, reconnect to a strong Wi-Fi network and try the iOS update again.

11. Reset All Settings, Then Factory Reset

If your iPhone still won’t update, you should consider wiping your device. In the same Reset menu mentioned above, you can either reset all settings on your iPhone or perform a factory reset to erase everything.

Resetting your settings probably won’t fix an update issue, but it’s worth a try first if nothing else has worked. Keep in mind that this will change all options back to their defaults, so you’ll have to configure options like privacy preferences and notifications again:

  1. Launch Settings > General.
  2. Choose Transfer or Reset iPhone.
  3. Select Reset > Reset All Settings.
  4. Confirm with your passcode.

All your settings are now reset; try to update again once you reconnect to Wi-Fi. If it works, great! You’ll need to put all your settings back as they were. If that didn’t fix your problem, you can go to the most extreme route and reset your device to factory defaults.

Keep in mind that factory resetting will erase all the data on your iPhone. Make sure you’ve backed up your iPhone before proceeding so you don’t lose any information.

Here’s how to factory reset your device:

  1. Open Settings > General.
  2. Hit Transfer or Reset iPhone.
  3. Select Erase All Content and Settings from the bottom of the page.
  4. Walk through the steps, including entering your passcode to confirm.

Your device will now revert back to its factory state. Because everything is fresh again, you’ll hopefully be able to update without issue. You can restore your iPhone backup during the setup process.

iPhone Updating Troubles: Fixed!

If none of the steps above have worked and your iPhone still won’t update, the next move is contacting Apple Support directly. They can run a diagnostic on your device remotely and, if necessary, walk you through a DFU (Device Firmware Update) restore — a deeper wipe that resets the firmware itself, not just the software layer, and tends to fix problems that nothing else touches. Worth trying before you give up. If you’re getting error codes like 9, 4005, 4013, or 4014 during a computer restore, though, those specific errors often indicate hardware failure — a damaged storage chip or a broken USB controller — which is a repair, not a troubleshooting problem.

It’s frustrating when your iPhone won’t let you update. Hopefully, one of these fixes solved your problem and you can now enjoy the latest version of iOS. If you are still having problems, you can book a genius bar appointment an let Apple tech team look into the problem.

Apple Pay Not Working on iPhone? Here’s The Fix

By Kevin Shaw · March 25, 2026

  • If Apple Pay is not working on your iPhone, make sure the terminal works with Apple Pay.
  • If it does, try removing your phone case and selecting the credit card manually from your Wallet app.
  • Other tips include restarting your iPhone, updating iOS, and checking your Face ID and Apple Pay settings.
  • You can also try replacing your credit card in the Wallet app and signing out and back into your Apple account.

Apple Pay stands among the most advanced, widely used modern payment processing technologies. It executes transactions entirely from your iPhone. Also, since Apple Pay is accepted at over 85 percent of retailers in the U.S., you can likely use it wherever and however you want carrying nothing but your phone.

To use Apple Pay on your iPhone, first look for the contactless payment symbol at checkout. Next, double-click the side button. When your default card appears, authenticate with Face ID or your passcode. Finally, hold the top of your iPhone near the card reader until you see Done or a checkmark on the screen.

Although using Apple Pay on the iPhone is easy, the feature isn’t without its flaws. While the feature rarely crashes, it can happen. And you don’t want to be caught at the till when it does—especially if you don’t carry cash around anymore.

Fortunately, most Apple Pay issues are easy to fix. Here are seven ways you can fix Apple Pay when it’s not working on your iPhone.

Make sure the point-of-sale terminal works with Apple Pay

The first thing you should do when Apple Pay is not working on your iPhone is to verify that the POS (point-of-sale) terminal accepts Apple Pay payments. Although mobile wallets are widely recognized payment methods accepted by most major retailers in the US, you still can’t automatically assume that all merchants accept them.

If the POS system accepts Apple Pay, ask the store clerk if they frequently encounter similar issues with mobile payments. They might know some quick fixes. For instance, they might need to check the POS internet connection or change a setting at the checkout. They could even advise you to take off your phone case or hold the phone at a specific angle to improve NFC connectivity.

Remove your phone case

Take your iPhone out of its case and try the payment again. The NFC antenna on your iPhone sits near the top of the device (around the rear camera area), and bulky, metal, or magnetic cases can block the signal from reaching the card reader.

This is one of those fixes that sounds too obvious, but it trips up a lot of people — and I mean a lot. Heavy-duty shockproof cases, wallet-style cases with credit cards tucked inside, and cases with magnetic mounts for car holders are the worst offenders. If Apple Pay works fine without the case but fails with it on, you’ve found your problem and it might be time to shop for a thinner, NFC-friendly case. Even some MagSafe-compatible cases from third-party manufacturers have caused intermittent NFC failures, so don’t assume a pricey case is safe just because it has the MagSafe logo on the box.

Try choosing a card manually

When Apple Pay and the terminal are working normally, the Apple Pay wallet launches automatically with your default card selected when you bring the phone near the terminal. Although this feature streamlines checkouts, the NFC chips on POS terminals don’t always read Apple Pay properly.

In these instances, you’ll need to select your preferred card manually and then try the terminal again:

  1. Open the Wallet app on your iPhone.
  2. Choose the card you want to use for the purchase.
  3. Hold the top of your iPhone near the contactless reader.

Wallet app on iPhone

If the reason why Apple Pay wasn’t working on your iPhone involved NFC connectivity, your transaction should finally push through. When this happens, you should see Done and a checkmark appear on your iPhone’s display.

If you have more than one card in your Wallet, it’s also worth checking whether the default card you’ve been using has expired or been flagged by your bank. An expired card or a card your bank has temporarily blocked for suspicious activity won’t process a payment through Apple Pay, even though it still shows up in your Wallet. You can check your card details by tapping the card in the Wallet app and then tapping the three-dot menu in the top-right corner.

Check the System Status of Apple Pay

If you’ve already tried choosing a card manually, it’s time to check the system status of Apple Pay. Apple Pay depends on an online service to be up and running, and if Apple Pay is offline, you won’t be able to complete the transaction. Of course, Apple Pay has a very high uptime and it’s unlikely to not be working. But if you want to know if the problem is at your end or at Apple’s end, visit the Apple System Status webpage and see if Apple Pay & Wallet has a green status light. If it doesn’t, nothing you do at your end will fix it, so you should make a purchase the old fashioned way.

Restart your iPhone

If you’re still unable to use Apple Pay, you should try restarting your iPhone. A quick restart refreshes your device’s memory and clears the temporary cache, which might be interfering with the Apple Pay feature. If you are not in a hurry (this will take several minutes), get out of line and restart the phone, then try again after the phone is back up and running.

To restart, press and hold the side button and either volume button until the power-off slider appears. Slide to power off, wait about 30 seconds, then press and hold the side button again until you see the Apple logo. A regular restart usually does the trick, but if Apple Pay still won’t respond after that, try a force restart instead — press and quickly release the volume up button, press and quickly release the volume down button, then press and hold the side button until the Apple logo appears.

Update your iPhone

Go to Settings > General > Software Update and install any available iOS update. Apple and card issuers periodically release updates that patch bugs affecting Apple Pay, and running an outdated version of iOS is one of the more common reasons the feature stops working — particularly right after a major release.

If you’ve been putting off an update for a while (and honestly, most of us have at one point or another), that pending update could be exactly what’s breaking your payments. Some users reported widespread Apple Pay and NFC failures after upgrading to iOS 26, and Apple addressed several of those issues in follow-up patches like iOS 26.0.1 and 26.0.2. Keeping your iPhone on the latest version won’t guarantee that Apple Pay never acts up, but it rules out a whole category of known software bugs that Apple has already fixed.

Check your Face ID and Apple Pay settings

Open Settings > Face ID & Passcode (or Touch ID & Passcode on older models), enter your passcode, and make sure Contactless & Payments is toggled on under the “Use Face ID For” section. While you’re there, scroll down and confirm that Wallet is enabled under “Allow Access When Locked.”

Allow Access for Wallet When Locked

These settings can get switched off after an iOS update without any warning, and when they’re off, Apple Pay either won’t authenticate your payment or won’t even appear when you double-click the side button at checkout. You’ll also want to check one more thing: go to Settings > Wallet & Apple Pay, tap Apple Pay Defaults, and verify that Double-Click Side Button is turned on. If that toggle is off, double-clicking does nothing and you’ll just be standing at the register wondering why your cards aren’t showing up.

Replace your credit card in Apple Pay

From here on out, the potential fixes are increasingly inconvenient and time-consuming, so try them if nothing else works and you don’t want to enlist the help of Apple’s customer support.

The easiest of these more involved fixes is removing and replacing the cards in your Apple Wallet. This is especially likely to fix your problem if you have several credit cards in your wallet but only one of them fails to work. By removing and replacing that problematic card, you may be able to fix a glitch in the way that card was stored or accessed.

  1. Open the Wallet app on your iPhone.
  2. Tap the card that isn’t working properly.
  3. Tap the More button (⋯), then tap Card Details.
  4. Scroll down and tap Remove Card. You will need to confirm this choice.
  5. Restart your phone.
  6. Open the Wallet app again and tap the Add button (+).
  7. Tap Debit or Credit Card and follow the directions to add that same card back again.

When you re-add a card, your bank goes through a fresh verification process, which can clear out old token data or provisioning errors that built up over time. If Apple Pay shows the card as “Not Verified” or “Verification Required” after you add it back, tap the card and follow the prompts — your bank may send a verification code via text or ask you to call in.

Sign out and back into your Apple Account

It’s possible that something has gone awry with the way you are signed into your Apple account, so in the same way that you might have tried to restart your iPhone or replace your credit card, you can sign out of your Apple account and sign back in again.

  1. Open the Settings app on your iPhone.
  2. At the top of the page, tap your name.
  3. Scroll to the bottom of the page and tap Sign Out. You’ll need to confirm that you want to do this. Sign out settings on iPhone
  4. Restart your phone.
  5. Return to the Settings app and sign back into your Apple account.

Signing out resets the authentication link between your Apple account and the payment tokens stored on your device. It’s a heavier fix than a restart, and you’ll need to re-enter your Apple account password and possibly go through two-factor authentication again, so make sure you have access to your trusted device or phone number before you sign out. Once you’re signed back in, your cards should reappear in the Wallet — though in some cases you may need to re-add one or two of them.

Contact Apple customer support

If Apple Pay is still not working on your iPhone, you should reach out to Apple customer support for further help. It’s possible that you have a hardware problem — for example, the NFC chip used to communicate with the point of sale terminal might not be working. This isn’t something you can easily test or troubleshoot on your own, so enlist the help of Apple.

Before you go to an Apple Store, call Apple Support at 1-800-MY-APPLE (or use the Apple Support app) and ask them to run a remote diagnostic on your iPhone. The diagnostic can check whether your NFC module is functioning properly, and it saves you a trip if the problem turns out to be software-related after all. If the diagnostic points to a hardware failure — and NFC chip failures are more common than you’d think, especially on iPhones that have been dropped — you may need an in-person repair at an Apple Store or Apple Authorized Service Provider. In some cases, a damaged NFC module requires a full board replacement, which Apple may cover partially or fully if you have AppleCare+.

If you’d rather exhaust every software option before calling Apple, you can also try resetting your network settings as a last resort. Go to Settings > General > Transfer or Reset iPhone > Reset > Reset Network Settings. This won’t erase your photos or apps, but it will wipe all saved Wi-Fi passwords, VPN configurations, and cellular settings, so you’ll need to reconnect to your Wi-Fi networks afterward. VPN apps in particular have been known to interfere with NFC payments — if you have a VPN installed, try deleting it completely (not just turning it off) and testing Apple Pay again before you reset everything.

If you decide to visit an Apple Store, make sure to book a genius bar appointment first.

Primary Sidebar

Trending

Battery settings on iPhone

How to Calibrate iPhone Battery: Step-by-Step

Two Genius Bar technicians provide one-on-one support to customers in a sleek, wood-paneled Apple Store

How to make a Genius Bar appointment

Multiple iPhone 17 devices shown from the side and featuring the full color lineup: lavender, mist blue, sage, white, and black.

How to Force Restart, Enter DFU, Recovery Mode on iPhone 17.17 Pro

An angled side-profile view of Apple Watch Series 11.

Why You NEED an Apple Watch in 2026!

A passenger in the back of a car looks at the new iPad Pro with M5 on the go.

5 REASONS to Buy an iPad in 2026

Footer

Site Links

  • Home
  • Contact us
  • About Us
  • Editorial Principles
  • Our Staff
  • Write For Us
  • Guest Post Policy
  • Accessibility
  • Privacy
  • Terms
  • Copyright Notice

Copyright © 2026 iPhoneArena.com · All Rights Reserved