• Skip to primary navigation
  • Skip to main content
  • Skip to primary sidebar
  • Skip to footer

iPhoneArena

APPLE IPHONE, MAC, WATCH AND IPAD

  • Home
  • iPhone
  • iPad
  • Mac
  • Apple Watch
  • Bug Fixes
  • How to
  • Tips and Tricks
  • Apps
You are here: Home / Archives for Stacey Butler

Stacey Butler

iPhone Black Screen? Here’s The Real Fix!

By Stacey Butler · March 27, 2026

Learn what to do if your iPhone has the black screen of death.

Black screens might appear if your iPhone overheats, encounters a major error, or the screen itself breaks.

To fix iPhone black screen, you should first plug your phone into a charger to make sure that it isn’t simply out of battery.

If you’re lucky, a force restart may be all you need to fix your iPhone black screen issue. Otherwise, you’ll need a computer.

If Find My is enabled, or you’re connecting your iPhone to a computer for the first time, you cannot restore it using Finder or the Apple Devices app.

If a force restart and standard restore don’t work, try DFU mode — it reinstalls iOS at the deepest level and can fix problems that recovery mode can’t.

If software fixes fail, physical damage might be the culprit. Take your iPhone to Apple or an authorized service provider to diagnose and resolve hardware issues.

The black screen of death occurs when an iPhone is completely unresponsive. Sometimes, you’ll hear alerts and feel vibrations, but you won’t be able to interact with your phone. Although physical damage is often the culprit, you shouldn’t rule out system glitches.

Luckily, there are ways to fix nearly every “Black Screen of Death” glitch on your iPhone. Depending on the problem, you might just need to leave the iPhone alone for a while, or plug it into your computer.

Here’s what to do if your iPhone has the black screen of death, and some tips for preventing black screens in the future.

How to fix a black screen on your iPhone

1. Charge your iPhone

The first thing you should do if your iPhone has the black screen of death is to check that your phone’s battery isn’t dead. When you try to interact with an uncharged iPhone, it’ll usually flash an empty battery icon. But if the battery’s been totally drained, the screen might go completely blank.

Plug your iPhone into a working charger and leave it for at least an hour. If you come back and it’s still showing a black screen, then you can move onto the next steps.

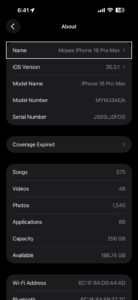
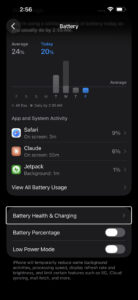
If your iPhone is a couple of years old, it’s worth checking your battery health once the screen comes back on. On iPhone 15 and later, go to Settings > Battery > Battery Health and look at the Maximum Capacity percentage. (On iPhone 14 and earlier, this is under Settings > Battery > Battery Health & Charging instead.) iPhones with a battery below 80% are more likely to experience unexpected shutdowns and black screens, especially during or right after an iOS update — that long update process can push a weak battery past its limit. Apple recommends replacing the battery once it drops to around 80%.

Battery settings on iPhone

Quick tip: You should also feel the back of your iPhone, without its case. If it’s incredibly hot, your iPhone might be overheating and will need to cool down before you can use it again. Leave it in a cool area for a while.

2. Force Restart Your iPhone

The next thing you should do when encountering the black screen of death issue is force restarting your iPhone. This is different from a regular reboot, and it’s useful when you can’t shut your iPhone down normally.

Force restarting requires a combination of button presses and can take a few tries since you’ll need to press each button quickly. Quickly press the Volume Up button, then the Volume Down button, and then press and hold the Side button until you see the Apple logo appear.

If your iPhone went black during or right after an iOS update, a force restart is still the first thing to try. Sometimes the update process stalls and leaves the screen dark even though the phone is technically still on (and you might still feel it vibrate or hear notification sounds). The force restart can take up to 20 seconds of holding the Side button before anything happens, so don’t give up too quickly — count it out.

3. Restore Your iPhone With Apple Devices or Finder

If your iPhone screen is still black even after you’ve tried force restarting it, you’ll need to factory reset it. You can do this using the Apple Devices app for Windows or Finder on macOS.

Restoring your iPhone with the Apple Devices app or Finder will erase all its data and bring it to factory settings. So, only try this if you have a recent backup so that you don’t lose all your data.

Note that this method will only work if you’ve connected your iPhone to Apple Devices or Finder before. That’s because when you connect your iPhone to a computer for the first time, you’ll get an alert on your iPhone (and your computer), prompting you to trust the device.

You can’t tap Trust on an iPhone showing a black screen, so you’ll have to hard reset your iPhone using the recovery or DFU mode, which we’ll discuss later.

Additionally, you can only proceed with these steps if you have Find My disabled on your iPhone. Otherwise, you’ll get an alert message prompting you to turn off Find My during the process. In this case, you’ll need to disable the Find My feature from iCloud and erase your iPhone remotely.

To do that, go to iCloud.com/find on any browser, sign in with your Apple Account, select your iPhone from the list, and tap Erase iPhone. This wipes the device remotely, which also removes the Find My lock so you can set it up fresh from a backup afterward. You’ll need to remember your Apple Account password to get through this, so make sure you have that handy before you start.

As long as you meet the above requirements, you’re all set. Simply connect your iPhone to your PC or Mac using a USB cable. Launch the Apple Devices app or Finder, and follow the steps mentioned below:

Click [Your Name]’s iPhone under the Locations header on the sidebar. You can skip this step if you’re using Apple Devices.

Head to the General tab and click Restore iPhone on the right.

When prompted to back up your settings before restoring your iPhone, click Back Up.

Next, click Restore when you get a confirmation pop-up.

The process may take several minutes to complete. So, be patient. Once it’s done, you can restore your iPhone from a backup.

4. Use Recovery Mode to Factory Reset Your iPhone

Recovery mode is a feature that lets you connect your iPhone to a computer so the computer can repair it. It usually does this by installing a fresh version of iOS, the software that your phone runs on.

Entering recovery mode on your iPhone requires you to force restart your device once you connect it to your computer and launch Apple Devices or Finder.

Quickly press and release the Volume Up button. Then, repeat the same with the Volume Down button. Finally, press and hold the Side button until you see the Recovery Mode screen.

The Apple Devices app or Finder will now show a pop-up message indicating that it has detected an iPhone in recovery mode, after which you can choose to Update or Restore your device.

Try Update first. Updating reinstalls iOS without erasing your data, which means you won’t lose your photos, messages, or apps. If the black screen was caused by a corrupted or failed iOS update, this alone can fix it — and you keep everything. Only choose Restore if the update doesn’t work or fails partway through, because restoring wipes the iPhone completely and brings it back to factory settings.

5. Put Your iPhone in DFU Mode

If recovery mode didn’t fix the black screen, DFU mode goes a step deeper. Connect your iPhone to your computer with a USB cable, open the Apple Devices app or Finder, then follow this button sequence: quickly press and release the Volume Up button, quickly press and release the Volume Down button, then press and hold the Side button until the screen goes black. Once the screen is black, keep holding the Side button and also press and hold the Volume Down button together for about 5 seconds. After 5 seconds, release the Side button but keep holding the Volume Down button for another 10 seconds.

If you did it right, your iPhone’s screen stays completely black — no Apple logo, nothing — and your computer will say it detected a device in recovery mode. That’s DFU mode. The timing on those button presses is finicky (and honestly a little annoying), so you might need two or three attempts before you get it. If the Apple logo shows up at any point, that means you held the Side button too long, and you’ll need to start over.

DFU stands for Device Firmware Update, and it lets your computer reinstall both the firmware and iOS from scratch. Recovery mode only reinstalls the operating system, but DFU mode goes underneath that to the firmware layer, which is why it can fix problems that recovery mode can’t — things like boot loops or corrupted system files that keep the iPhone stuck on a black screen no matter what else you try. Save this step for after recovery mode fails, because a DFU restore erases everything on the iPhone and there’s no way around that.

One thing to watch out for: if you’re using a USB-C to USB-C cable and DFU mode won’t trigger, try switching to a USB-A to Lightning or USB-A to USB-C cable with an adapter. Some users have reported that certain USB-C cables don’t work reliably for DFU mode.

6. Take Your iPhone to Apple

If none of these solutions work, the black screen of death is likely due to physical damage or other hardware issues. In that case, you must contact Apple Support or take your iPhone to a nearby Apple Store or an Apple Authorized Service Provider. It’s easy to make an Apple Store appointment at a Genius Bar.

If your iPhone was recently exposed to water or any other liquid — even a brief splash — that could be causing the black screen. On iPhone 13 and earlier (or models sold outside the US that still have a SIM tray), you can check for liquid damage by popping out the SIM tray and shining a light inside — there’s a small Liquid Contact Indicator (LCI) in there that turns red when it’s been in contact with water. On US models of iPhone 14 and later, there’s no SIM tray and no externally visible LCI, so you won’t be able to check this yourself — bring it to Apple or an Apple Authorized Service Provider and they can inspect it internally. If it’s red, liquid damage is the most likely cause, and no amount of force restarting or restoring will fix a hardware-level short circuit.

If you recently had your iPhone screen replaced by a third-party repair shop (not Apple or an Apple Authorized Service Provider), that’s another thing to mention when you bring it in. Third-party screens can sometimes lose connection with the display after an iOS update, leaving you with a phone that works in the background but shows nothing on screen. The fix in that case is usually having the repair shop reseat or reconnect the display cable.

Remember that Apple’s standard one-year warranty doesn’t cover replacements or repairs for damaged screens. So, unless you’ve spent money on an AppleCare+ extended warranty plan, you’ll have to pay a fee to get your iPhone serviced.

How to prevent black screens on your iPhone in the future

Hitting an unresponsive black screen can be scary, especially if your iPhone plays a critical role in your job or social life. So once you’ve fixed the black screen on your iPhone, take steps to make sure that it doesn’t come back.

Uninstall glitchy apps

If the black screens started appearing on your iPhone after you installed a certain app, the two might be connected.

Uninstall any apps you’ve downloaded recently and continue using your phone. If the black screens stop happening, you know what caused it.

Keep your iPhone at a normal temperature

Despite its price, the iPhone is a delicate device that needs to be handled carefully. Obviously, this means that you shouldn’t drop it or smother it in honey. But it also means that you need to keep track of its temperature.

An iPhone that gets too hot or too cold will shut down and give you a black screen — worst case scenario, your battery might short out permanently. This can be a big problem if you’re trying to run multiple high-performance apps at once, or have your iPhone in a thick case that traps heat.

Apple recommends storing your iPhone in areas where the temperature ranges from -4º to 113º F (or -20º and 45º C).

In some cases, your iPhone might freeze and show a warning message telling you to let it cool down. If you see this, move to a cooler area and leave your iPhone alone for a while.

Use Certified Charging Accessories

Stick to Apple-certified (MFi) cables and chargers whenever possible. Cheap or counterfeit charging accessories can deliver inconsistent power to your iPhone, and over time that can cause battery issues, unexpected shutdowns, or — in worst-case scenarios — damage to the charging circuit on the logic board. If you’ve been using a no-name cable from a gas station and your iPhone starts acting up, try swapping it out for a certified one before you assume something bigger is wrong.

Keep an Eye on Battery Health

On iPhone 15 and later, go to Settings > Battery > Battery Health every few months and check your Maximum Capacity. (On iPhone 14 and earlier, look under Settings > Battery > Battery Health & Charging.) Once that number drops below 80%, your iPhone’s battery is considered degraded and you’re more likely to run into random shutdowns, black screens during updates, and general instability. Apple will replace the battery at an Apple Store or authorized service provider — it’s a lot cheaper than replacing the whole phone, and it can make an older iPhone feel new again.

Factory reset your iPhone

If you keep hitting black screens despite uninstalling recent apps, there might be an issue with your version of iOS. You can put the iPhone into recovery mode, like we described earlier, or you can factory reset it.

Factory resetting an iPhone will erase all of its data, and return the phone to the state it was in when you bought it. It’s an extreme but incredibly useful way to fix major glitches.

Important: Be sure to back up your personal data before performing a factory reset.

To factory reset your iPhone, open the Settings app and tap General, then Transfer or Reset iPhone. On the screen that appears, select Erase All Content and Settings.

Although the black screen of death on an iPhone can be an immediate cause for concern, it’s worth trying a few software fixes before seeking professional help, especially if you haven’t physically damaged your iPhone. Start with charging and a force restart, move to recovery mode if those don’t work, and try DFU mode as a last software-level resort. If nothing brings the screen back, the problem is almost certainly hardware — a damaged display, a failing battery, or a loose internal connector — and you’ll want to get it looked at by Apple or an authorized service provider rather than trying to fix it yourself.

iPhone Photos Not Syncing to iCloud? Here’s The Fix

By Stacey Butler · March 27, 2026

Find out what you can do if your iPhone photos aren’t syncing to iCloud.

iCloud Photos is a nifty iPhone feature that saves every photo and video you take to the cloud, allowing you to access your library from any device at any time. Any changes you make to your collection on one device are replicated across all of your other devices.

But, sometimes, things go wrong in the pipeline, and your Apple devices stop syncing your photos. If for some reason, your iCloud Photos aren’t syncing properly, you could lose some precious photos and fond memories. So, to avoid that pain, let’s look at a few steps to take if your photos aren’t syncing to iCloud.

1. Check Your Settings

If your photos aren’t syncing to iCloud on your iPhone, you should first check if you have the correct iCloud Photos configuration. First, open the Settings app and tap on your name at the top of the screen. Check that you’re signed in to the same Apple Account you used to set up iCloud Photos.

If you’re already signed in to the correct Apple Account, the second step is to ensure that iCloud Photos is enabled on your device. Tap on iCloud, select Photos, and check that Sync this iPhone is toggled on.

Turn on Photos in iCloud Settings

If Sync this iPhone is already on but your photos still aren’t uploading, try toggling it off and then back on again. Wait about 30 seconds before you flip it back on — this forces your iPhone to re-establish its connection with Apple’s iCloud servers and can kick a stuck sync back into gear.

If you set up an iCloud Shared Photo Library, there’s one more thing to check. When you move photos to your Shared Library, they disappear from your Personal Library, and that can look a whole lot like a sync failure when it’s actually working as intended. Open the Photos app, tap Library, then tap the Sort and Filter button — or tap Collections, then tap the More button — and look at your Library View Options to confirm you’re viewing Both Libraries rather than just your Personal Library. (On iOS 18, tap the profile button in the upper corner instead and scroll down to Library View Options.)

2. Check Your Internet Connection

Because iCloud is a web-based service, iCloud Photos may not sync on your iPhone when your internet connection is not working. To ensure your connection is good, check to see if other apps can connect to the internet or try to launch a new web address in your browser.

If the problem is your internet connection, try resetting your router or troubleshooting your cellular data to see if that solves the problem. You can also try resetting your iPhone network settings.

To reset your network settings, go to Settings > General > Transfer or Reset iPhone > Reset > Reset Network Settings. Your iPhone will restart, and when it comes back up you’ll need to re-enter your Wi-Fi passwords — all of them get wiped along with any saved VPN configurations and Bluetooth pairings. It’s a bit of a hassle, but it clears out corrupted network data that can quietly prevent iCloud from connecting.

If your connection is fine but you’re attempting to use cellular data for iCloud Photos, you need to enable this function first. Otherwise, your iCloud photo library will not show up on your iPhone.

To do so, turn on your iPhone’s cellular data first. Then, go to Settings > Apps > Photos > Cellular Data. Toggle on Cellular Data, and if your data plan allows, you can also opt to toggle on Unlimited Updates.

3. Turn Off Low Power Mode

Go to Settings > Battery > Power Mode and make sure Low Power Mode is turned off. If your iPhone battery is below 20%, iCloud Photos will pause syncing on its own even without Low Power Mode enabled, so plug in before you troubleshoot further.

Screenshot showing Low Power Mode settings on iPhone

Low Power Mode cuts back on background activity to stretch your battery life, and iCloud Photos syncing is one of the first things it shuts down. It’s easy to overlook. After all, a lot of people turn it on during a busy day and forget about it, then spend an hour wondering why their photos aren’t uploading to iCloud. While you’re at it, check for Low Data Mode too — go to Settings > Wi-Fi, tap the info button (the little ⓘ) next to your connected network, and make sure Low Data Mode is off. That setting throttles background data usage (which includes photo uploads) and can quietly block your iCloud Photos sync without any visible warning.

4. Check Apple’s System Status

Open Safari and go to apple.com/support/systemstatus to check whether iCloud services are experiencing an outage. Look for Photos, iCloud Account & Sign In, and Apple ID specifically — if any of those show a yellow or red indicator, the problem is on Apple’s end and no amount of troubleshooting on your iPhone will fix it.

Apple’s servers don’t go down often, but when they do, it affects millions of devices at once. There was a widespread iCloud outage in February 2026 that knocked out Photos, Find My, and several other services for hours. If you see a problem on the status page, the only thing to do is wait for Apple to resolve it — usually a few hours at most. Bookmark the page so you can check it fast next time something feels off.

5. Check Your iCloud Storage

Another common culprit for photos not uploading to iCloud on your iPhone is a lack of storage. Every Apple user gets 5GB of free iCloud storage, but that’s hardly enough—especially if you take many photos regularly.

To be sure you haven’t run out of storage, you’ll have to check your current usage.

  1. Go to Settings.
  2. Tap your name.
  3. Tap iCloud.

You see how much space you have left in iCloud and if you need to upgrade your storage plan. If you have maxed out your free iCloud storage, you need to either upgrade your storage plan or reduce the amount of storage that you’re using. Tap Manage Account Storage to see how apps are using your storage.

6. Optimize Your iPhone Storage

Depending on the quality of photos you’ve chosen to upload to iCloud, you could max out your iPhone storage quickly, which will also cause iCloud Photos to not update correctly.

By default, all your photos and videos are saved in their original, high-resolution format on your device and in iCloud Photos. But you can use the Optimize Storage feature to save storage space on your iPhone.

Optimize Storage allows iCloud Photos to manage the size of the library on your iPhone. When this option is turned on, your original, high-quality photos and videos are stored in iCloud, while compressed versions remain on your device. You can download the full-resolution versions from iCloud via Wi-Fi or cellular at any time.

To enable this option, follow these steps:

  1. Tap Settings > [your name] > iCloud > Photos.
  2. Select Optimize iPhone Storage to save space on your device.

7. Check Your Photo Library Status

Open the Photos app and tap the profile button in the upper corner of the screen — on iOS 26 or later, tap Collections first, then tap the profile button. Your library status appears right below your name and photo count, and it will tell you exactly what’s going on with your sync: whether it’s paused, actively uploading, or stuck on a specific number of items.

This is the single most useful diagnostic step that most people skip. Your iPhone is actually pretty good about telling you why syncing stopped — the problem is that the status message is buried in a spot nobody thinks to look. You might see messages like “Optimizing System Performance” or “Poor Network Connection” or even “[Device] Needs to Cool Down,” and each one means something different. If you see a Sync Now button, tap it to force an immediate upload. If the status says your library is up to date but you’re still missing photos on another device, the issue might be on the receiving end rather than the uploading end.

8. Restart Your iPhone

If your iCloud Photos are still not syncing, try rebooting your iPhone. This will fix any software glitches that could be hindering your photos from syncing to iCloud. Simply turn your iPhone off and back on, then check if your problem is fixed.

9. Update Your iPhone

An outdated version of iOS could be the reason for many performance issues, including the problem where iCloud Photos is not syncing on your iPhone. Check your phone for software updates and install them to fix any bugs that might be the culprit of the issue.

  1. Go to Settings > General > Software Update.
  2. If an update is available, tap Update Now then follow the onscreen instructions.

10. Plug In Your iPhone to Charge

iCloud syncs photos when the device is plugged in and connected to Wi-Fi. So, if iCloud Photos isn’t syncing, find the nearest power outlet and plug your phone in. Then, make sure your iPhone can connect to Wi-Fi while you leave it alone to charge and sync.

If you have a large photo library — we’re talking thousands of photos and videos — the initial sync can take a long, long time. Apple recommends leaving your iPhone plugged in and connected to Wi-Fi overnight to let the upload finish without interruption. Don’t keep checking the Photos app every five minutes either, because opening and using the phone can slow down background syncing. Lock the screen, walk away, and let it work.

11. Sign Out and Back Into Your Apple Account

Go to Settings, tap your name at the top, scroll all the way down, and tap Sign Out. Your iPhone will ask whether you want to keep a copy of certain data on the device — choose to keep it so nothing gets removed. Once you’re signed out, wait a minute, then sign back in with the same Apple Account.

This is a heavier fix and you shouldn’t need it in most cases, but signing out and back in forces your iPhone to rebuild its connection to iCloud from scratch. It clears out authentication tokens and any corrupted sync state that a normal restart wouldn’t touch. The downside is that it takes a while for everything to re-sync afterward (not just photos — your contacts, calendars, notes, and other iCloud data will all need to re-download too), so don’t do this one right before you need to be somewhere.

Keep Your iCloud Photos Synced and Up to Date

iCloud Photos is an excellent feature for syncing media across your Apple devices. If you take advantage of it, make sure you have everything set up and running smoothly so that it serves its purpose.

We hope that the above fixes have resolved any hitches you ran into. However, if you still encounter issues where your iCloud Photos aren’t syncing, you may want to take your iPhone to a Genius Bar for more help.

Before you make a Genius bar appointment, try reaching out to Apple Support through the Support app or at support.apple.com — they can run remote diagnostics on your iCloud account that you can’t do yourself, and sometimes the issue is a server-side flag on your account rather than anything on your device. If your photos have been stuck for days and you’ve gone through every step here, that’s a strong sign the problem goes deeper than settings.

iPhone Won’t Update? Here’s The Real Fix!

By Stacey Butler · March 25, 2026

Having problems updating your iPhone to the latest version of iOS? There are a few reasons why you can face these issues. Don’t be disheartened, though—there’s usually a simple solution to the problem.

Let’s look at some fixes that will help you get the latest iOS running on your iPhone properly. Here’s how to fix your iPhone when it won’t let you update iOS.

Software update screen on iPhone

1. Check Device Compatibility

Go to Settings > General > About and check the Model Name at the top of the page. iOS 26 requires an iPhone 11 or later — which also means the iPhone XR, iPhone XS, and iPhone XS Max are out, even though those don’t feel that old. There’s nothing broken. If you have one of those devices and can’t see the update, that’s Apple’s compatibility cutoff, not a problem you can fix.

About settings on iPhone showing model name

Apple cuts off support for older iPhones (and I do mean cuts off, not gradually winds down) when those devices no longer have the processing power or memory to run the new iOS reliably. There’s some nuance, though. If you’re on an older device, Apple still issues security patches for a while after it stops the big feature updates — so your phone isn’t completely abandoned the moment the major updates end. The security support window can last a few years after the major iOS cutoff. On that hardware, there’s no workaround to get the new features or design changes — and if your iPhone genuinely can’t handle the new iOS version, that’s the right call.

2. Charge Your iPhone

As you probably know, your iPhone won’t let you upgrade if you don’t have enough battery power. This is to prevent your device from shutting off in the middle of an update, which can cause serious problems.

Make sure you plug in your iPhone and have plenty of battery charge before starting the iOS update. It’s a good idea to leave it on the charger while the process runs, too. That way, if it takes longer than expected, your phone won’t run out of power.

3. Make sure your phone has access to Wi-Fi

Your iPhone won’t update if it doesn’t have a Wi-Fi connection.

Make sure you’re connected to a reliable Wi-Fi network when you try to update. Some updates, because they are so large, require a Wi-Fi connection. We recommend using Wi-Fi instead of cellular data when downloading updates, as it’s faster and won’t eat into your data plan.

Open Settings and tap Wi-Fi. Make sure the switch next to Wi-Fi is on, and that a checkmark appears next to the name of your Wi-Fi network.

The best way to ensure your iPhone can update is by performing the update at home or in an office where you have access to a reliable Wi-Fi network.

It’s worth restarting your router if you haven’t done so in a while. If you have continued issues, you might also try connecting to another network and seeing if you have the same issue there.

4. Ensure you have enough available storage

Next, check if your iPhone has enough room to store the update.

Go to Settings > General > iPhone Storage. In this menu, you’ll see how much storage you have used and remaining. Depending on what’s taking up space, your phone will provide a few recommendations, including:

  • Offload Unused Apps
  • Review your photos and videos

iPhone storage screen showing available storage space

Let’s look at what these do.

Offload Unused Apps deletes the install data for any apps that you rarely use. This won’t delete any of your personal files; only the app data itself is deleted. When you want to use the app again, you can redownload it as long as it’s still available on the App Store.

Review your photos and videos lets you review your media files including screenshots, duplicates so you can delete items you don’t need. This is often an easy way to gain a big chunk of storage, especially if you have stored a lot of videos and photos on your iPhone.

As a general target, minor iOS updates (like 26.0 to 26.1) typically need around 5–6 GB of free space to install. A major version jump — moving from iOS 18 to iOS 26, for example — can require closer to 20 GB during installation, even if the final update file itself is much smaller. If you’re close to the limit, consider doing the update through your computer instead, where the storage math works out differently.

Once you’ve increased your free space, try the iOS update again.

5. Wait a While Before Updating

When Apple releases a new iOS update, millions of people are connecting their iPhones to Apple servers to download and install it. With all those people connecting simultaneously, Apple’s server may struggle to keep up, which could be the reason why your iPhone won’t update.

If you receive an error when trying to update to the latest version of iOS, try waiting for a while. You should have better luck later when the update servers aren’t under as much strain.

The update menu lets you schedule a system update to run overnight, when most people in your area won’t be trying to update. Try that, and if it doesn’t work either, visit Apple’s website to see if their servers are working properly.

Apple maintains a System Status page at apple.com/support/systemstatus that shows the real-time health of every Apple service, including Software Update. Check it before you spend an hour troubleshooting. If you see yellow next to Software Update, nothing you do on your iPhone is going to fix it — that’s Apple’s problem to fix, not yours.

6. Restart your iPhone

If your phone hasn’t been restarted in a while, there could be a glitched app or other temporary issue preventing the update from occurring.

Rebooting a computer can resolve a lot of problems, and your iPhone is no exception to this rule. Simply turn your iPhone off and back on, then try to update again.

7. Remove a Beta Profile

If you’re enrolled in Apple’s beta testing program — or if you were enrolled at some point and forgot to unenroll — your iPhone may be stuck waiting for a beta update instead of the public release. Go to Settings > General > VPN & Device Management. If you see a beta profile listed (it’ll say something like “iOS Beta Software Profile”), tap it, then tap Remove Profile and restart your iPhone. It takes about ten seconds. After that, go back to Settings > General > Software Update to check for the regular update.

Beta profiles are what tell your iPhone to check Apple’s beta update servers instead of the standard release servers. When you have one installed and the beta cycle ends — which happens when Apple pushes the full public release — your iPhone can get stuck in a very, very strange state: it keeps reporting that an update is available but won’t actually install it, and the Software Update screen offers no useful explanation for why. Tracking down that type of problem without knowing to look for a beta profile can take a long time. If you removed the profile and restarted, go back to Settings > General > Software Update and check again — the regular iOS update should now appear.

8. Update your iPhone using your computer

While most people are used to updating iOS right on their iPhone, you can still run a system update through your computer with iTunes or Finder. It’s not quite as convenient, but can come in handy if the over-the-air update isn’t working for you. This is also a solution if you can’t create enough free space on your device.

  1. Connect your iPhone and your computer with a cable.
  2. Do one of the following:
    • On a Mac (macOS 10.15 or later): In the Finder sidebar, select your iPhone, then click General at the top of the window.
    • On a Mac (macOS 10.14 or earlier) or a Windows device: Open the iTunes app, click the button resembling an iPhone near the top left of the iTunes window, then click Summary.
  3. Click Check for Update.
  4. To install an available update, click Update.

9. Delete Old Update Data

If you try to install an iOS update and it fails, the update data sits on your device so you don’t have to re-download it. But if there’s something wrong with what you downloaded, you need to delete it to force your iPhone to run the update again.

To do this, go to Settings > General > iPhone Storage, check to see if the update has already downloaded. Scroll down the list of apps below the Storage Recommendations and look for an iOS update. If you see the update file, tap on it, then tap Delete Update.

Now that the iOS update is deleted, go to Settings > General > Software Update to download the update again.

10. Reset Network Settings

If you still can’t update your iPhone, reset your network settings to start fresh. Note that this will clear out all network preferences you’ve saved, so you’ll need to reconnect to all previously saved Wi-Fi networks again. This will also reset any VPN configurations you use.

Before you do the full network reset, though, check whether you have an active VPN or proxy on your iPhone (a VPN can block Apple’s update servers just as effectively as a broken connection). Try that first. If turning the VPN off doesn’t fix the update, go to Settings and tap VPN & Device Management to remove the VPN profile entirely, then try the reset steps below. Some VPN apps reroute your iPhone’s traffic through servers that can’t reach Apple’s update process.

To reset network settings on your iPhone:

  1. Open Settings and tap General.
  2. Scroll down to Transfer or Reset iPhone.
  3. Select Reset at the bottom, followed by Reset Network Settings.
  4. Enter your passcode and confirm you want to do this.

Once you reset your Wi-Fi configuration, reconnect to a strong Wi-Fi network and try the iOS update again.

11. Reset All Settings, Then Factory Reset

If your iPhone still won’t update, you should consider wiping your device. In the same Reset menu mentioned above, you can either reset all settings on your iPhone or perform a factory reset to erase everything.

Resetting your settings probably won’t fix an update issue, but it’s worth a try first if nothing else has worked. Keep in mind that this will change all options back to their defaults, so you’ll have to configure options like privacy preferences and notifications again:

  1. Launch Settings > General.
  2. Choose Transfer or Reset iPhone.
  3. Select Reset > Reset All Settings.
  4. Confirm with your passcode.

All your settings are now reset; try to update again once you reconnect to Wi-Fi. If it works, great! You’ll need to put all your settings back as they were. If that didn’t fix your problem, you can go to the most extreme route and reset your device to factory defaults.

Keep in mind that factory resetting will erase all the data on your iPhone. Make sure you’ve backed up your iPhone before proceeding so you don’t lose any information.

Here’s how to factory reset your device:

  1. Open Settings > General.
  2. Hit Transfer or Reset iPhone.
  3. Select Erase All Content and Settings from the bottom of the page.
  4. Walk through the steps, including entering your passcode to confirm.

Your device will now revert back to its factory state. Because everything is fresh again, you’ll hopefully be able to update without issue. You can restore your iPhone backup during the setup process.

iPhone Updating Troubles: Fixed!

If none of the steps above have worked and your iPhone still won’t update, the next move is contacting Apple Support directly. They can run a diagnostic on your device remotely and, if necessary, walk you through a DFU (Device Firmware Update) restore — a deeper wipe that resets the firmware itself, not just the software layer, and tends to fix problems that nothing else touches. Worth trying before you give up. If you’re getting error codes like 9, 4005, 4013, or 4014 during a computer restore, though, those specific errors often indicate hardware failure — a damaged storage chip or a broken USB controller — which is a repair, not a troubleshooting problem.

It’s frustrating when your iPhone won’t let you update. Hopefully, one of these fixes solved your problem and you can now enjoy the latest version of iOS. If you are still having problems, you can book a genius bar appointment an let Apple tech team look into the problem.

How to force restart your iPhone

By Stacey Butler · March 20, 2026

iPhones are pretty reliable, but sometimes issues may occur. Sometimes, your iPhone freezes, hangs, starts acting bizarrely or becomes unresponsive. When things do not work as expected, the last resort is to force your iPhone to restart.

Previously, I explained the different ways to turn your iPhone off and on. This article explains how you can force your iPhone to restart.

  • When Should You Force Restart?
  • How to Force Restart an iPhone
    • How to force restart an iPhone 8 or later, including iPhone SE (2nd and 3rd generation)
    • How to force restart an iPhone 7 or iPhone 7 Plus
    • How to force restart an iPhone 6s and earlier, including iPhone SE (1st generation)
  • Conclusion

When Should You Force Restart?

Now and then, your iPhone or iPad might suffer some form of a software glitch. It can be an iOS update gone wrong, a rogue app, or just an iOS bug that won’t go away.

Force restarting is most helpful when your iPhone is stuck and unresponsive. When you can’t even turn off your device, try force rebooting it—it usually fixes the issue.

How to Force Restart an iPhone

The process of force restarting an iPhone differs between phone models. While the process is different, the result is the same. Follow the steps for your device.

How to force restart an iPhone 8 or later, including iPhone SE (2nd and 3rd generation)

  1. Press and quickly release the volume up button.
  2. Press and quickly release the volume down button.
  3. Press and hold the side button.
  4. When the Apple logo appears, release the side button (this takes about 10 seconds).

How to force restart an iPhone 7 or iPhone 7 Plus

  1. Press and hold both the side button and the volume down button.
  2. When the Apple logo appears, release both buttons (this takes about 10 seconds).

How to force restart an iPhone 6s and earlier, including iPhone SE (1st generation)

  1. Press and hold both the Home button and the side button or the top button.
  2. When the Apple logo appears, release both buttons (this takes about 10 seconds).

Conclusion

Force Restarting an iPhone resolves many iOS issues. If your device won’t boot up, or if you’re experiencing a system-level bug, before taking a trip to the Genius Bar, see if a force restart will fix the issue.

How to clear cache on your iPhone

By Stacey Butler · March 20, 2026

This article explains how you can clear cache on your iPhone. The instructions in this guide will work on iPhone 17 series, iPhone 16 series, iPhone 15 series, iPhone 14 series, iPhone 13 series, and iPhone 12 series running the latest version of iOS 26.

Your iPhone’s web browser picks up a lot of files, images and data from the websites that you visit, and a lot of that does not need to be on your iPhone. Whether you’re using Safari, Google Chrome, or Mozilla Firefox, this data stored in your cookies and cache can be helpful in some cases. It’s what lets you quickly load websites you frequently access and keeps you logged into accounts you have. That’s great, but there’s plenty of information in the cookies and cache of your browser that isn’t necessary and could even be a privacy risk.

What is cache?

Cache — aka browser cache — refers to the temporary storage of certain data, including images, files, and scripts from websites you’ve visited. Such website content is stored — or cached — on your phone to help your browser execute faster the next time you visit that site.

Why Clear Cache on iPhone

Why should we clear the cache on the iPhone? Clearing cache on iPhone has many benefits. These include:

  • It will help you see the most recent webpage changes.
  • It may fix some Safari issues, such as Safari freezing.
  • It may speed up your iPhone.
  • It may help you free up storage space on your iPhone.

How to Clear Cache in Browser on iPhone

Web browsers temporarily stores Internet files (images, web site pages and files, etc.) when you visit websites to reduce server lag so that you can view the websites faster in the future. In short, these cache files are useful in faster loading of the web pages.

Whether you use Chrome, Safari or other browsers on your iPhone, your cache builds up that digital clutter over time. Clearing your cache gives the browser a new start, which can speed up your web surfing, even on iOS 17 or the latest iOS 18.

Here are step-by-step instructions on how to clear your cache on your iPhone based on the browser you use.

Clear Cache in Safari on iPhone

Safari is the default browser on iPhones, and you can clear your Safari cache in a few easy steps. Starting with iOS 11, following this process will affect all devices signed in to your iCloud account. As a result, all your devices’ caches will be cleared, and you’ll need to sign in to everything the next time you use them. Here’s what to do.

  1. On your iPhone, go to Settings > Apps > Safari.
  2. Tap on Clear History and Website Data.
  3. Tap on Clear History to confirm.

Clear Cache in Chrome on iPhone

Chrome is another popular browser for iPhone users. Thankfully, Google makes it easy to clear your Chrome cache, making it much faster to clear your data.

  1. On your iPhone, open Chrome.
  2. Tap on More button.
  3. Tap on Settings.
  4. Tap on Privacy and Security.
  5. Tap on Delete Browsing Data. Another menu will open up. Select the intended time range at the top of the menu (anywhere from Last Hour to All Time). Make sure that Cookies, Site Data is checked, along with Cached Images and Files.
  6. Tap on Delete Browsing Data.
  7. In the popup window, tap on Delete Browsing Data to confirm.
  8. Tap Done when you’ve deleted the Chrome cache.

Clear Cache in Firefox on iPhone

If you’re a Firefox user, we got you covered. Clearing the cache on your iPhone is pretty easy. Just follow these steps.

  1. On your iPhone, open Firefox.
  2. At the bottom-right of the screen, tap on the menu button.
  3. Tap on Settings at the bottom of the menu.
  4. Tap on Data Management under the Privacy section.
  5. You can select Website Data to clear data for individual sites, or select Clear Private Data at the bottom of the screen to clear data from all selected fields.

Clear App Cache on iPhone

Restart iPhone to Clear Cache

  • If your iPhone has a Face ID:
    • Press and hold either volume button and the side button until you see the power-off slider.
    • Drag the slider, then wait 30 seconds for your phone to turn off fully.
    • To turn your phone back on, press and hold the side button (on the right side of your iPhone) until you see the Apple logo.
  • If your iPhone has a Home button:
    • Press and hold the side button until you see the power-off slider.
    • Drag the slider, then wait 30 seconds for your phone to turn off.
    • To turn your phone back on, press and hold the side button until you see the Apple logo.

Reset iPhone to Clear Cache

Factory reset your iPhone to clear its cache. Open the Settings app. Then tap on General > Transfer or Reset iPhone > Erase All Content and Settings and confirm your decision. You’ll be asked to enter your passcode, followed by your Apple Account password to turn off Apple’s Find My service.

After entering your password, the screen will go dark and the Apple logo along with a progress bar will show up. A few minutes later, you’ll be greeted with a screen with “Hello” in different languages flashing on it, indicating the reset was a success. This will also clear your iPhone cache.

How to Backup Important Data before Clearing the Cache

Before you clear cache on your iPhone, create a backup that you can use to restore your data. You can use iCloud to back up your phone by going to Settings > Apple Account > iCloud > iCloud Backup > Back up now. This backup method can take a while, depending on how long it’s been since you’ve backed up your phone, but it’s pretty easy.

Just make sure to keep your phone connected to a Wi-Fi network and on a charger to prevent the backup from draining the battery.

How to Access Website without Leaving the Cache

If you’re learning how to clear the cache on an iPhone, you might wonder if there’s a way to use Safari without leaving cache. Yes! To visit sites without leaving cache, simply turn Private Browsing on.

Enable Private Browsing

  1. Launch Safari on your iPhone.
  2. Tap the Tabs button.
  3. Swipe to the Private tab group button, then tap the tab that you want to open.

Block Cookies

A cookie is a piece of data that a site puts on your device so that site can remember you when you visit again.
To block cookies:

  1. On your iPhone, go to Settings > Apps > Safari > Advanced.
  2. Turn on Block All Cookies.

There are also third-party extensions — such as Ghostery and Disconnect — that help you block cookies and trackers in Google Chrome.

If you block cookies, some websites might not work. The following are some examples:

  • You will likely not be able to sign in to a site even when using your correct username and password.
  • You might see a message that cookies are required or that your browser’s cookies are off.
  • Some features on a site might not work.

What happens when you clear iPhone cache?

Clearing your iPhone cache removes the website data your phone stored locally to prevent having to download that data upon each new visit. The data in your cache builds over time and can end up slowing things down if it becomes too bulky or out of date. (My phone had about 160MB of data stored in Chrome when I checked.) Clearing that data gives sites a fresh start, which may fix some loading errors and speed up your browser. Clearing your cache also signs you out of pages, so be prepared to sign in to everything again.

How often do I need to clear iPhone cache?

Most people only need to clear their iPhone cache once every month or two. That’s generally the point when your browser will build up a cache large enough to start slowing things down. If you frequent a large number of sites, you should err on the side of clearing your cache more often.

How to Force Restart, Enter DFU, Recovery Mode on iPhone 17.17 Pro

By Stacey Butler · March 24, 2026

Apple’s iPhone 17, ‌iPhone Air‌, iPhone 17 Pro, and ‌iPhone 17 Pro‌ Max come in different sizes compared to its predecessor iPhone 16 series, but they still share some common design elements with Apple’s 2024 models, such as an Action Button and no Home button on the front.

If you’re upgrading from a device with a Home button, keep reading to learn how to power on and off, force a restart, enter DFU mode, enter recovery mode, activate Emergency SOS, and temporarily disable Face ID. Below you’ll find step-by-step guides for performing the button combinations of all of the above functions, along with explanations of what the more obscure ones do and why they might one day come in useful.

How to Hard Reset the iPhone 17 (All models)

  1. Press and quickly release the Volume Upbutton.
  2. Press and quickly release the Volume Down button.
  3. Press and hold the Side button until you see the Apple logo, then release the Sidebutton.

During this process, you will see a slider to power off the iPhone. You’re going to want to ignore it and continue holding down the Side button until the screen goes black. At that point, the Apple logo will pop up, and after the restart is complete, the screen will activate once again.

Using the force restart process prevents you from having to shut the iPhone down entirely, which takes several more steps.

If you do want to shut the iPhone 17 down, you can do so by going to the General section of the Settingsapp, scrolling down to the bottom, and choosing the Shut Down option.

iPhone 17 Button Basics

Apple changed many of the physical button functions on its smartphones with the launch of the ‌iPhone‌ 8 and ‌iPhone‌ X, so if you’re upgrading from a device that pre-dates these 2017 models, you’ll want to familiarize yourself with them.

Face the screen of your new ‌iPhone‌ and you’ll see that there are two volume buttons and a single Action Button on the left-hand side. The Action button is directly located above the volume buttons on the left side of your device. There is a single Side button and Control Button on the right-hand side. The Camera Control is directly located below the Side button on the right side of your device. The volume buttons and Side button work in combination to undertake the steps discussed in this article.

Other Useful Things to Know

How to Power on iPhone Air, iPhone 17, iPhone 17 Pro, and iPhone 17 Pro Max

To turn on your iPhone 17‌, press the Side button once. If the Apple logo doesn’t appear on the screen, the device may need charging — plug it into a power outlet using the supplied USB-C cable, and let it charge for at least a few minutes before trying again.

Press and hold the Side button along with the Volume Up or Volume Down button until two sliding buttons appear on the screen.

How to Power off iPhone Air, iPhone 17, iPhone 17 Pro, and iPhone 17 Pro Max

  1. Press and hold the Side button along with the Volume Up or Volume Down button until two sliding buttons appear on the screen.
  2. Release the physical buttons and swipe right on the slide to power off button at the top of the screen.

How to Enter Recovery Mode on iPhone Air, iPhone 17, iPhone 17 Pro, and iPhone 17 Pro Max

Entering recovery mode can help if you’re having trouble updating or restoring your iPhone 17 over the air. For example, if the screen shows the Apple logo for several minutes but no progress bar appears, you can try putting the device in recovery mode and restoring it with iTunes. Here’s how it works.

  1. Using the USB-C cable that came with your iPhone 17, connect the device to your computer. If you’re using a Mac running macOS Mojave or earlier, or you’re connecting to a PC, make sure you have the latest version of iTunes installed.
  2. On a Mac running macOS Catalina or later, open Finder. On a Mac with macOS Mojave or earlier, or on a PC, open iTunes. If iTunes is already open, close it, then open it again.
  3. With the iPhone connected, force restart it with the following steps, but don’t release the buttons when you see the Apple logo. Instead, wait until the recovery mode screen appears.
  4. Press and quickly release the Volume Upbutton.
  5. Press and quickly release the Volume Down button.
  6. Press and hold the Side button until you see the recovery mode screen, then release it.
  7. If you’re using iTunes, select your device in the iTunes sidebar. Otherwise, select your device in the Finder sidebar.
  8. When you see the option to Restore or Update, choose Update. Your computer will try to reinstall the software without erasing your data. Wait while your computer downloads the software for your device.

How to Exit Recovery Mode on iPhone Air, iPhone 17, iPhone 17 Pro, and iPhone 17 Pro Max

Simply press and hold the Side button until the “Connect to iTunes” screen disappears, and your iPhone should reboot back into iOS.

How to Enter DFU Mode on iPhone Air, iPhone 17, iPhone 17 Pro, and iPhone 17 Pro Max

The forced restart procedure described above can help if an iPhone 17 is freezing, throwing up errors, or has stopped responding completely. DFU mode (standing for Device Firmware Update) on the other hand restores an iPhone if a restart or entering standard Recovery Mode doesn’t solve the problem you’re experiencing.

DFU mode lets the device interface with Finder or iTunes, update the firmware, and restore the OS without automatically installing the last downloaded version. It’s useful for installing older versions of iOS if a beta persistently hangs your phone, or if a jailbreak goes bad.

Before following the steps below, make sure you have the latest version of iTunes installed on your computer.

  1. Turn on your iPhone if it isn’t already.
  2. Connect it to your computer using a USB-C cable.
  3. On Macs running macOS Mojave or earlier and PCs, make sure that iTunes is running. On Macs running macOS Catalina or later, make sure Finder is running.
  4. On your iPhone, press the Volume Upbutton immediately followed by the Volume Down button.
  5. Next, press and hold the Side button (or power button) until your iPhone’s screen turns black.
  6. Release the Side button and then hold down both the Side button and Volume Down button together for approximately five seconds.
  7. Now release the Side button, but continue to press the Volume Downbutton.
  8. Wait for at least five seconds for Finder or iTunes to recognize DFU recovery mode has been enabled.

If you’re using iTunes, you should see a message dialog saying “iTunes has detected an iPhone in recovery mode. You must restore this iPhone before it can be used with iTunes”. If you’re using Finder, you should see a similar message. If you don’t see the message, repeat the steps above.

Once you’ve closed the recovery prompt you can go ahead and restore your iPhone back to factory settings by selecting Restore iPhone on the iPhone Recovery Mode screen. Once restored, your iPhone will automatically exit out of DFU mode and boot up to its activation screen.

How to Exit DFU Mode on iPhone Air, iPhone 17, iPhone 17 Pro, and iPhone 17 Pro Max

If you enabled DFU mode and want to manually exit out of it, here’s how it’s done.

  1. Press the Volume Up button on your iPhone and quickly release it.
  2. Press the Volume Down button and release it.
  3. Press and hold the Side button until the Apple logo appears on your iPhone’s screen.

Your iPhone should now have exited DFU recovery mode.

How to Activate Emergency SOS on iPhone Air, iPhone 17, iPhone 17 Pro, and iPhone 17 Pro Max

Activating Emergency SOS on your iPhone 17 automatically calls emergency services and sends a text message with your location information to the people in your emergency contacts. For this reason, you should only use it when you’re in danger or facing a genuine emergency. Note that you’ll need to enter your iPhone’s passcode to reenable Face ID and unlock your iPhone after performing Emergency SOS.

  1. Press and hold the Side button as well as either one of the Volume buttons, so that you’re essentially squeezing either side of the device.
  2. Keep squeezing until the Emergency SOS countdown initiates on the screen. You can either wait for the countdown to finish or slide it across to call the emergency services immediately and alert your emergency contacts.

If you don’t want Emergency SOS to automatically call emergency services when the Side button is pressed, make sure to disable Auto Call via Settings -> Emergency SOS -> Disable Auto Call.

How to Disable Face ID on iPhone Air, iPhone 17, iPhone 17 Pro, and iPhone 17 Pro Max

Disabling Face ID on your iPhone 17 makes it so your passcode has to be entered to unlock it. By disabling facial authentication, a police officer or malicious person can’t unlock your iPhone simply by holding it in front of your face.

  1. Press and hold the Side button.
  2. Press and hold either Volume button.
  3. Tap the Cancel button that appears at the bottom of the screen.

Where are your iPhone Microphones located? All models explained

By Stacey Butler · March 20, 2026

You may want to know the locations of the microphones on your iPhone. Your iPhone has several built-in microphones. Knowing where the microphones are located on your device can be very useful for many troubleshooting purposes. For example, if the microphones are not working properly, you may need to locate them on your iPhone to clean any debris from the openings to fix your problems. This guide can be important because microphone location can vary by iPhone model.

Your device’s microphones do a lot of important functions. For example, they are used for noise canceling or recording videos in stereo. Without functioning microphones, you will not be able to make phone calls or FaceTime calls, or Siri will not be able to detect your voice.

The microphone is a small hole, embedded in a pinhole. This is why it may not be easy to locate. Integrated, or built-in, microphones are often found on the back near the camera, top of the display, and at the bottom of your iPhone.

You can also buy and use an external microphone.

Microphones Location on iPhone 17, iPhone 16, iPhone 15, iPhone 16, iPhone 14, iPhone 13, iPhone 12, iPhone 11, and iPhone XS

The microphone locations are the same for the iPhone 17, iPhone 16, iPhone 15, iPhone 14, iPhone 13, iPhone 12, iPhone 11, and iPhone XS. In fact, the locations haven’t really changed since the iPhone 5.

There are four microphones on these iPhone models:

  1. The first set of microphones are located at the bottom of the iPhone. It captures your voice when you’re on a phone call and you have your phone held to your ear. It’s somewhat disguised and it looks like the speaker holes next to it.
    Tip: Tilt your iPhone up to look at the charging port. You’ll see a lineup of small holes on both sides. The holes on the left of the port are for one microphone, while the holes to the right are for both the other mic and one of the iPhone’s speakers.

  2. Another microphone is located right at the top of the glass in the center on the front of your iPhone. It’s difficult to see, but it helps capture sound during FaceTime and other video calls and while using the speaker during a phone call.
    Tip: That little narrow slit towards the top of the iPhone’s screen, which we all know houses the speaker (because that’s where our ear goes during phone calls), also contains a mic. For the iPhone 15 and newer, the mic is stealthily tucked just above the Dynamic Island.

  3. The other microphone is on the back of your iPhone, next to the camera lenses. It looks like a small pinhole. It records sound when you’re taking videos with your iPhone.
    Tip: Flip your iPhone on the back. You will see a tiny pinhole nestled in between the various cameras, the flash, and other rear sensors. That’s your iPhone’s rear Mike.

Microphones Location on iPhone XR, iPhone X, iPhone 8, iPhone 7, iPhone 6S, iPhone 6, iPhone SE, iPhone 5S, iPhone 5C, and iPhone 5

These iPhone models have 3 microphones:

  1. The first microphone is located at the bottom of the iPhone.

  2. The second microphone is located on the back of the iPhone.

  3. The third microphone is on the front of the iPhone.

Microphone location on iPhone 4S and iPhone 4

iPhone 4 models include dual microphones. The top one is for noise cancellation. And the bottom is for functions such as, recording a voice memo, or talking to Siri.

Older iPhones:

The older iPhone models (1st generation, 3G, and 3Gs) have one microphone which is located at the bottom of the device.

For more iPhone tips and tricks, check out our tips and tricks section.

Primary Sidebar

Trending

A close-up view of the back of iPhone 17 Pro.

iPhone Flashlight Not Working? Here’s The Real Fix

Battery settings on iPhone

How to Calibrate iPhone Battery: Step-by-Step

No Internet connection on your iPhone? Here’s The Fix

Show All Contacts in Your Phone App

Contacts Not Showing on iPhone? Here’s The Real Fix

iPhone Air is held up by a hand between the letters “A” and “R,” forming the word “AIR.”

Call Failed on iPhone? Here’s Why and Fix!

Footer

Site Links

  • Home
  • Contact us
  • About Us
  • Editorial Principles
  • Our Staff
  • Write For Us
  • Guest Post Policy
  • Accessibility
  • Privacy
  • Terms
  • Copyright Notice

Copyright © 2026 iPhoneArena.com · All Rights Reserved